A Guide to Midjourney Image Generation
Midjourney turns your text prompts into some seriously unique, high-quality images with AI. It's a favorite tool for artists and creators, largely because it's known for generating visuals that feel genuinely artistic and interesting, sidestepping that generic "AI look." Getting started is surprisingly simple—it all happens on Discord with a few basic text commands.
Your First Steps in AI Art Generation
So, you're ready to dive into Midjourney. Good. This is the AI tool that transforms your words into incredible visuals, and this guide is your practical roadmap. We're going to skip the dense technical jargon and get you creating right away. I'll show you how to get set up on Discord, learn the essential commands, and generate your very first image in minutes.
You're about to see why Midjourney has become such a critical part of the creative process for so many artists, completely changing how we approach digital art. Even top AI media creators who use a whole suite of tools often start their workflow in Midjourney, purely for its stylistic range and power.
Why Midjourney Stands Out
Midjourney really shines in a few key areas, making it the go-to choice for creative projects. Its biggest advantage is the ability to generate images that feel more like art and less like a computer's best guess. This isn't just a gimmick; it's a legitimate tool for visual expression.
Here’s where it really excels:
- Artistic Aesthetic: Midjourney is famous for its visually compelling and often beautiful images. It has a knack for avoiding that sterile, obviously computer-generated vibe.
- Style Consistency: It’s incredibly good at keeping a consistent artistic style across dozens of images. This is a lifesaver for projects that need a cohesive look and feel.
- Character Creation: The platform is also great at handling photorealistic characters. You can get surprisingly nuanced variations in poses and expressions from a single character concept.
From my experience, Midjourney is particularly amazing for creating visual metaphors and symbolic imagery. It gives you an intuitive way to translate abstract ideas into something tangible and compelling, which is something I've struggled with on other platforms.
Embracing the Creative Ecosystem
While we're focusing on Midjourney here, it's worth remembering that it's part of a much bigger world. If you're looking to build out your AI toolkit, you might want to explore other powerful AI tools for content creators as well. The field is packed with specialized tools, and knowing their individual strengths is key.
To get a better sense of how Midjourney fits into the bigger picture, check out our guide on modern text-to-image models. For now, this introduction should give you the confidence to dive into the more advanced techniques we'll cover next.
Setting Up Your Midjourney Workspace
Before you can bring any ideas to life, you need a digital studio. With Midjourney, that studio is actually Discord, the popular community platform. Everything you do—from typing your very first prompt to upscaling your final masterpiece—happens right inside Discord. Getting set up is pretty simple, but knowing the lay of the land from the start makes the whole experience a lot less chaotic.
First things first, you'll need a Discord account. If you've already got one, you're ahead of the game. Once you're signed in, your next move is to join the official Midjourney server. This is the hub where a massive community of creators, including the developers themselves, all interact with the AI bot. Think of it as a sprawling, collaborative art studio where you’re constantly surrounded by inspiration.
Navigating the Midjourney Server
When you first join the server, it can feel a little overwhelming. You'll see a long list of channels scrolling down the left sidebar. Don't let it intimidate you; you only need to pay attention to a couple of key areas to get started.
Look for channels with names like #newbies or #general. These are the public image generation channels, and they’re the perfect sandbox for new users. I highly recommend just hanging out in these channels for a bit. You get to see the prompts other people are using in real time and, more importantly, how the Midjourney bot interprets their ideas.
This initial observation is an invaluable crash course. You’ll quickly pick up on how certain words, phrases, and parameters shape the final image. It’s like getting to look over the shoulder of thousands of artists at once.
Choosing the Right Subscription Plan
Midjourney did have a free trial back in the day, but its wild popularity meant they had to switch to a subscription-only model to manage demand. This is your first real decision point. Midjourney offers a few different subscription tiers, and the main difference between them is the amount of GPU time you get—that's the raw processing power used to create your images.
- Basic Plan: A great entry point if you're just looking to experiment and play around. It gives you a limited amount of "Fast" GPU time each month.
- Standard Plan: This is the sweet spot for most regular users. You get more Fast GPU time plus unlimited access to "Relax" mode, which doesn't eat into your monthly allowance but might take a bit longer to generate images.
- Pro & Mega Plans: Built for the power users and professionals out there. These plans come with a hefty amount of Fast GPU time and, critically, access to Stealth Mode.
Stealth Mode is a must-have for any commercial work or projects you need to keep under wraps. When it's on, your creations won't show up in the public Midjourney gallery, keeping your work private.
The platform's growth has been explosive, cementing its place as a major player in the generative art scene. As of 2025, Midjourney holds a market share of 26.8%, putting it ahead of big names like DALL-E. With a community of over 21 million users, it's a massive and active space. You can dig into more stats about Midjourney's market position on AIPRM.com.
Sending Your First Command
Okay, you’re in a newbie channel and your subscription is active. It's time to create something. Every interaction with the Midjourney bot begins with a slash command. To generate an image, the command you need is /imagine.
Just start typing /imagine into the message bar, and you'll see a prompt box pop up. This is where the magic happens. Here, you'll describe the image you want to see. For your first go, keep it simple but descriptive.
Try something like this: a cozy library with a fireplace, fantasy art style, detailed.
Hit enter, and the Midjourney Bot will fire up its digital forge. In a moment, you'll see a grid of four unique image variations appear in the channel—the bot's interpretation of your prompt. This grid is the launchpad for all your future refinements and upscaling.
And just like that, you've generated your first image with Midjourney. Congrats
Crafting Prompts That Get Amazing Results
The real magic of Midjourney isn't the AI—it's your prompt. This is where you translate the vision in your head into instructions the machine can actually follow. Getting beyond simple phrases like "a cat" is the first step to unlocking what this platform can really do. True prompt engineering is about structuring your ideas, layering in details, and choosing your words carefully.
Think of your prompt less like a command and more like a recipe. The main subject is your core ingredient, but the spices—the style, lighting, composition, and mood—are what give the final image its unique flavor. A well-built prompt guides the AI with precision, which means you're far more likely to get the image you want on the first try.
The Anatomy of a Powerful Prompt
Every killer Midjourney prompt has a few key components. You won't need all of them every single time, but knowing how they work together gives you incredible control over the final image. A solid structure keeps the AI from getting sidetracked or, worse, completely ignoring the most important parts of your request.
Let's break down the essential pieces you should be thinking about:
- Core Subject: This is the "who" or "what." Be specific. Instead of "a man," try "an old fisherman with a weathered face and a thick wool sweater."
- Artistic Style: This defines the whole vibe. Are you going for a "photograph," an "oil painting," a "line art illustration," or something "in the style of Hayao Miyazaki"?
- Lighting and Mood: This is where you set the emotional tone. Words like "dramatic cinematic lighting," "soft morning glow," "neon-drenched," or "eerie, foggy atmosphere" make a huge difference.
- Composition and Framing: Control how the subject is shown. Use terms like "wide-angle shot," "close-up portrait," "from a low angle," or "symmetrical."
- Level of Detail: Tell the AI how much complexity you want. Phrases like "highly detailed," "intricate patterns," "hyperrealistic," or "minimalist design" work wonders.
When you start combining these elements, you're building a comprehensive set of instructions. A simple idea like "a dog" quickly becomes "photorealistic portrait of a golden retriever in a field of wildflowers, soft morning light, detailed fur, shallow depth of field." That level of detail is what separates generic AI images from jaw-dropping art.
Layering Details for Deeper Results
Once you've got the basic structure down, the next level is to layer in more specific details. This is where you can reference specific artists, art movements, or even technical camera settings to really hone your vision. Midjourney has been trained on a mind-boggling amount of visual data, so it understands these kinds of references surprisingly well.
For instance, adding "in the style of Ansel Adams" will instantly push the AI toward high-contrast, black-and-white landscape photography. In the same way, adding "shot on a 50mm lens, f/1.8" tells the AI to create that classic portrait look with a shallow depth of field and a creamy, blurred-out background.
From my own experience, the key takeaway is that specificity compounds. Each precise term you add doesn't just add its own meaning—it changes how the AI interprets all the other words in the prompt, leading to a much more cohesive and intentional result.
This layering technique is incredibly effective. As you get better at translating your ideas into text, you can even apply these same principles to other creative outputs, like learning to make personalized coloring pages with AI. The core skill is the same: turning vision into clear instructions.
From Vague Ideas to Concrete Prompts
Let’s walk through how a simple concept gets transformed into a high-quality prompt. This process of refining your idea is central to getting good at Midjourney.
Initial Idea: A futuristic city.
This is way too vague. The AI has no clue about style, mood, or focus. You'll get something bland and generic, guaranteed.
Adding Style and Mood: A cyberpunk city at night, Blade Runner aesthetic, neon lights reflecting on wet streets.
Okay, now we're talking. We’ve given it a specific genre (cyberpunk), a famous visual touchstone (Blade Runner), and key atmospheric details (neon lights, wet streets). This gives the AI a strong stylistic base to work from.
Incorporating Composition and Detail: Cinematic wide shot of a cyberpunk city at night, Blade Runner aesthetic, towering holographic advertisements, flying vehicles, neon lights reflecting on wet streets, highly detailed.
By adding "cinematic wide shot," we’ve told the AI exactly how to frame the scene. "Towering holographic advertisements" and "flying vehicles" give it concrete things to put in that scene, and "highly detailed" pushes for better rendering quality. This final prompt is specific, rich, and gives Midjourney clear, actionable directions. For more ideas, check out these 10 masterful Midjourney prompt examples for 2025 that really nail this kind of detailed construction.
The AI image generation space absolutely exploded in 2025, and Midjourney was right at the center of it. The market for AI image generators hit $468 million in 2025 and is expected to grow at a healthy 11.5% CAGR through 2033. The output is just staggering—across all platforms, an estimated 34 million AI images are now generated every single day.
Common Prompting Mistakes to Avoid
When you're just starting out, you're going to run into a few common roadblocks. Knowing about them ahead of time can save you a ton of frustration and wasted GPU minutes. Just remember, you’re talking to a machine that takes everything you say very, very literally.
- Avoid Negations: The AI is terrible with negative commands. Instead of prompting for "a person with no hat," you'll have much better luck with "a person with flowing hair." If you really need to exclude something, you'll want to use the
--noparameter, which we'll get into later. - Don't Be Too Abstract: While Midjourney can handle artistic concepts, prompts that are too philosophical or vague often lead to bizarre, confusing images. Always try to ground your ideas with concrete subjects and visual descriptions.
- Keep It Focused: A prompt that tries to juggle too many different things at once will just confuse the AI. If you want to create a complex scene with multiple characters, you're often better off generating them one at a time and combining them later.
By steering clear of these common slip-ups and focusing on clear, descriptive, and well-structured prompts, you'll be on the fast track to making incredible images with Midjourney.
Using Parameters for Precision Control
If prompts are the soul of your Midjourney image, parameters are the brain. They’re the technical commands that let you shift from being a hopeful creator to a deliberate director. Just by adding a small snippet to the end of your prompt, you can change everything from the image's shape to its artistic intensity.
Think of them like the manual settings on a professional camera. You can point and shoot in auto mode, sure, but the real magic happens when you start controlling the aperture, shutter speed, and ISO. In Midjourney, parameters like aspect ratio (--ar) and stylization (--stylize) give you that same level of fine-tuned control over the AI's creative process.
Shaping Your Canvas with Aspect Ratio
One of the most powerful and instantly noticeable parameters is aspect ratio, which you control with the --ar command. By default, Midjourney kicks out square images (--ar 1:1), which are great for things like profile pictures. But your creative ideas probably don't all fit into a perfect square.
This one simple command opens up a whole new world of composition.
--ar 16:9gives you that widescreen, cinematic feel for desktop wallpapers or video thumbnails.--ar 9:16is tailor-made for mobile content like Instagram Stories or phone backgrounds.--ar 3:2perfectly mimics the classic look of 35mm film photography.--ar 4:5is a go-to vertical format for print portraits and social media feeds.
Getting the aspect ratio right from the very beginning saves so much time later. Instead of trying to awkwardly crop a square image, you get to compose your scene inside the final frame, which helps the AI place every element exactly where it needs to go. A prompt for a "vast mountain landscape," for instance, just hits different with --ar 16:9 compared to a cramped 1:1 box.
I’ve found that setting the aspect ratio is the very first technical decision I make after writing my prompt. It fundamentally changes how Midjourney approaches the entire generation, influencing everything from character placement to the sense of scale in a landscape.
Controlling Creativity with Chaos and Stylize
Beyond just the shape, you can also dial in the creative intensity of your images. Two of the most important parameters for this job are --chaos and --stylize. They work together to manage the balance between how closely the AI follows your prompt and how much artistic license it takes.
The chaos parameter (--chaos <0-100>) dictates how much variety you see in the first image grid. A low value like --chaos 10 will produce four images that look very similar, giving you subtle variations on a theme. Crank it up to --chaos 80, and you'll get four wildly different concepts. This is fantastic for brainstorming when your initial idea isn't quite landing.
On the other hand, the stylize parameter (--stylize <0-1000>) controls how heavily Midjourney applies its own artistic training. A low value, like --stylize 50, forces the AI to stick very closely to your prompt, even if the result feels a bit plain. A high value, such as --stylize 700, gives the AI more freedom to get creative, often leading to more beautiful but potentially less accurate images. The default is 100, which is usually a great starting point.
This infographic breaks down the core components of a strong prompt, which you then modify with these parameters.
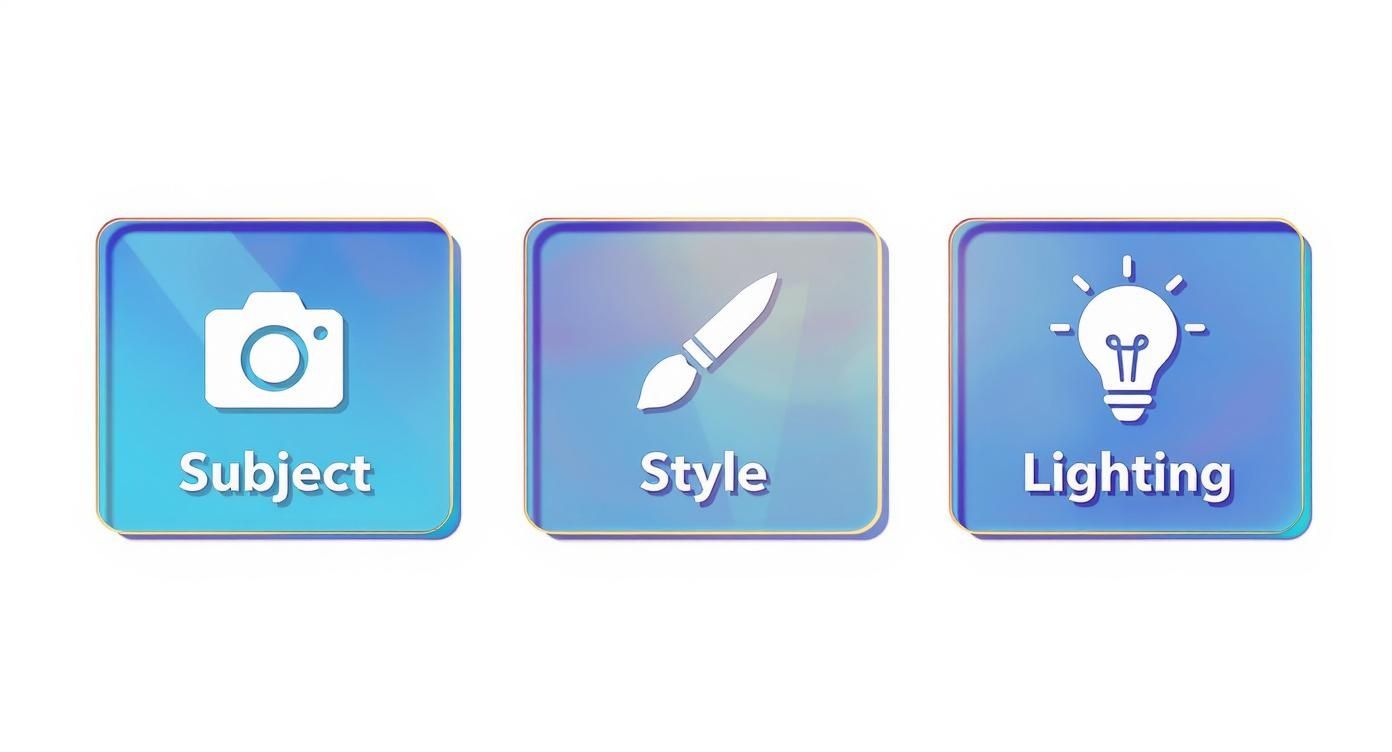
Think of it this way: the subject, style, and lighting in your text prompt provide the destination, while parameters fine-tune the route the AI takes to get there.
To help you keep track of the most common commands, I've put together a quick reference table.
Essential Midjourney Parameter Functions
| Parameter | Function | Example Usage |
|---|---|---|
--ar | Sets the aspect ratio (width:height) of the image. | ... --ar 16:9 |
--chaos | Controls the variation in the initial grid (0-100). | ... --chaos 50 |
--stylize | Influences how artistic the image is (0-1000). | ... --stylize 250 |
--no | Excludes specific elements from the image. | ... --no text, signatures |
--seed | Uses a specific starting noise pattern for consistency. | ... --seed 12345 |
This table is a great cheat sheet to have handy as you start moving beyond basic prompts.
Achieving Consistency and Exclusion
Finally, let's talk about two essential parameters for more advanced work: --seed and --no. These are your go-to tools for creating consistent characters and getting rid of things you don't want.
The seed number is basically an ID for the random noise pattern Midjourney uses to start generating an image. If you find an image you love, you can grab its seed number and reuse it with the --seed parameter. This lets you create new images with strikingly similar compositions and characters, even if you tweak the prompt slightly. It’s the single most important technique for character consistency.
And then there's the negative prompt parameter (--no), which is your magic eraser. Midjourney often struggles with negative phrasing in the main prompt (like "a person with no hat"). The --no command gives you a direct way to banish unwanted elements. If your cityscapes keep showing cars, tacking on --no cars is way more effective than trying to describe a car-free street. It's a lifesaver for removing extra fingers, ugly watermarks, or any other artifact that pops up.
How to Refine and Upscale Your Images
That first four-image grid you get from the /imagine command is just the opening act. The real magic happens in the next stage, where you take a promising concept and polish it into something special. This is where you move from broad strokes to fine details, turning a good idea into a great image.
Once your grid pops up, you’ll see two rows of buttons underneath it. The top row, labeled U1, U2, U3, and U4, is for upscaling. These buttons correspond to the images in the grid, starting with 1 in the top-left and moving across. Clicking one tells Midjourney to generate a larger, more detailed version of your favorite image.
The second row—V1, V2, V3, and V4—is for creating variations. This is your best friend when an image is almost perfect but just needs a little something different. It creates a brand-new grid of four images based on the style and composition of the one you picked, giving you slightly different takes on the same idea.
Selecting the Right Upscaler
After you click a "U" button, Midjourney goes to work and presents your newly upscaled image with a fresh set of options. The two big ones are Upscale (Subtle) and Upscale (Creative), and they offer very different paths forward.
- Upscale (Subtle): This option bumps up the image resolution while trying its best to keep the original details as faithful as possible. It's the perfect choice when you love the composition and just need a bigger, cleaner version for your project.
- Upscale (Creative): This upscaler also increases the resolution, but it takes some artistic liberties, reinterpreting details and adding new elements along the way. Use this when you want the AI to inject a bit more texture, complexity, or imaginative flair into the final piece.
Think of it like the difference between remastering a classic song and remixing it. One polishes what’s already there; the other introduces a whole new creative spin.
Expanding Your Canvas with Pan and Zoom
Ever feel like the perfect shot is just outside the frame? Midjourney's Pan and Zoom Out features are designed for exactly that, giving you the power to expand your canvas and see more of the world you’ve created. These tools are absolute game-changers for sweeping landscapes or complex scenes.
After you upscale an image, a set of arrow buttons will appear. These are the Pan controls. Clicking an arrow tells Midjourney to extend the image in that direction, intelligently filling in the new space based on what's already there. You can keep panning multiple times to build out an incredibly wide or tall scene.
The Zoom Out feature does exactly what it says on the tin. It pulls the "camera" back, revealing more of the surrounding environment while keeping your original image right in the center. It's an amazing tool for adding context and a sense of scale to your subject. These kinds of techniques share some ideas with other advanced methods; for example, you can see how AI reinterprets visual data in a practical guide to Stable Diffusion's image-to-image process.
When using Pan or Zoom, your original prompt is still in play. For the best results, simplify your prompt before expanding the canvas to focus only on the core elements. This gives the AI clearer direction as it generates the new content.
Fine-Tuning with Vary and Remix Mode
The "Vary" buttons are your secret weapon for quick iteration. If you like an image's overall vibe but can't stand a specific detail—like a character's weird hands or an object in the background—Vary is the answer.
- Vary (Subtle): This creates very minor changes in the new grid, which is ideal for tiny tweaks.
- Vary (Strong): This introduces more significant, noticeable changes, perfect for when you want a bolder reimagining of the concept.
But to really take control, you'll want to enable Remix Mode. Just type /settings and click the Remix Mode button to turn it on.
Now, with Remix active, clicking a "Vary" button opens a pop-up box where you can actually edit your prompt before Midjourney generates the new grid. This lets you specifically target and change parts of the image—like changing "a red car" to "a blue car"—without having to start all over again. It’s an essential part of an efficient and precise workflow.
Working Through Common Midjourney Glitches
Even the most experienced Midjourney users hit a wall sometimes. One minute you're on a creative roll, and the next, you’re staring at a grid of images with mangled hands, a key part of your prompt completely ignored, or a final result that just feels… bland. This isn't just you; it's a totally normal part of the process, and luckily, most of these common hiccups have a fix.
It's easy to get frustrated when the AI seems to have a mind of its own. You might carefully craft a prompt for "a knight in shining armor holding a single red rose," only for Midjourney to generate a knight holding a sword, or worse, no rose at all. This usually happens when the AI gets tangled up in too many competing ideas.
Getting Midjourney to Listen to Your Prompt
When Midjourney ignores a key detail, your first move should be to simplify and emphasize. Try rewriting your prompt to put the most important element right at the front.
If that doesn't do the trick, it’s time to bring out multi-prompting. This technique lets you separate concepts using a double colon (::). For our knight example, you could change the prompt to: a knight in shining armor:: holding a red rose::2. That ::2 is a weight, essentially telling Midjourney to pay twice as much attention to the rose. It gives you direct control over the AI's priorities.
Midjourney doesn't just read words; it weighs the relationships between them. By using weights, you’re fundamentally changing the prompt's conceptual hierarchy and forcing the AI to focus on what you deem most important.
When Your Images Look Generic or Uninspired
What happens when your images technically follow the prompt but have zero artistic flair? If your results feel sterile or predictable, the --stylize parameter is your best friend. The default value is 100, but you can crank it all the way from 0 to 1000.
- Less Stylization: Lowering the value (
--stylize 50) makes Midjourney stick much more literally to your prompt, reining in its artistic freedom. This is great for more technical or straightforward illustrations. - More Stylization: Pushing the value higher (
--stylize 750) gives the AI a license to get creative. It becomes more "opinionated," often leading to dramatic, visually striking compositions.
Given how fast the platform is growing, running into these issues is pretty common. By early 2025, Midjourney was seeing around 23,000 new users every single day, with the system processing 40 tasks per second. That’s a lot of people learning the ropes, which makes these troubleshooting skills essential for getting the results you want. You can read more about Midjourney's rapid expansion on Brandwell.ai.
Tackling Mangled Hands and Weird Faces
Ah, the classic AI art problem: creepy hands. While newer Midjourney versions are much better at this, distorted hands and faces still pop up from time to time.
The most reliable fix is often just to reroll. Use the "Vary" buttons under your image grid to generate new versions. Often, the second or third attempt will sort it out. If the problem keeps happening, try adding more descriptive language to your prompt, like "beautifully detailed hands" or "a perfectly symmetrical face," to nudge the AI in the right direction.
Common Questions About Midjourney
As you get deeper into Midjourney, a few common questions always seem to pop up. Let's tackle some of the big ones so you can get clear answers and get back to creating.
Can I Use My Images Commercially?
Yes, you absolutely can—if you have a paid subscription. Any images you create under the Basic, Standard, Pro, or Mega plans come with broad commercial rights. It's one of the best perks of subscribing.
Just remember, anything you made during the free trial period is licensed under a Creative Commons Non-Commercial license. So if you plan to sell your work, make sure it was generated under an active subscription. As always, it's a good idea to check their latest terms of service just to be safe.
How Do I Keep My Generations Private?
This is a big one for professionals and anyone working on sensitive projects. Privacy is a premium feature tied to the Pro and Mega plans, which give you access to Stealth Mode.
Once you enable it, your generations are completely hidden from the public Midjourney gallery. If you’re on the Basic or Standard plan, keep in mind that everything you create is public by default.
What Is the Difference Between Midjourney Versions?
Think of the version number as a major leap forward in Midjourney's core AI model. Each new version is a big deal.
The latest version, V6, is a massive improvement, offering a level of realism and detail that blows older versions out of the water. It’s also much better at understanding complex prompts and can even generate legible text within images, something previous models really struggled with. You can easily switch between versions by adding the --v parameter to your prompt (e.g., --v 6 or --v 5.2).