How to Generate AI Images from Text
So, you want to create AI images from text? It's simpler than you might think. You just need to give an AI art generator—something like Midjourney or DALL·E—a descriptive phrase, which we call a prompt. The AI takes your words, figures out what you mean, and conjures up a completely new image from scratch. It’s a wild process that turns language directly into art.
A Practical Introduction to AI Image Generation

Welcome to what feels like a new frontier in digital creativity. We're going to cut through all the hype and show you exactly how to turn simple text into incredible visuals. This has quickly become a game-changing skill for creators of all stripes.
This guide is designed to make the whole process feel less like magic and more like a tool you can actually use. It doesn't matter if you're a marketer who needs fresh social media content, a designer trying to visualize an idea, or just someone curious about what all the fuss is about. We’re skipping the generic fluff and getting right into the practical workflows that separate amateur results from professional-grade art.
Why This Skill Matters Now
Let's be clear: generating AI images from text isn't just a niche hobby anymore. It’s a fundamental shift in how we create content. This technology is already reshaping entire industries by making it possible to visualize concepts in seconds, create hyper-personalized content, and unlock new forms of artistic expression.
The growth is absolutely staggering. The AI image generator market is on track to balloon from USD 8.7 billion in 2024 to an estimated USD 60.8 billion by 2030. That’s not just a trend; it's a tidal wave.
This boom shows just how essential this skill is becoming. Think about a field like e-commerce, where AI product photography for fashion brands is now used to create stunning visuals at scale—a job that used to require massive budgets and elaborate photoshoots.
At its core, text-to-image generation is all about communication. The better you can describe your vision to the AI, the more breathtaking the results will be. It's a collaborative dance between human creativity and machine execution.
Getting a handle on this technology now gives you a massive advantage. To get started, you'll need to pick the right tool for the job. Our guide to modern text-to-image models is the perfect place to begin exploring your options. From there, this guide will give you the framework to start your journey.
Picking the Right AI Art Generator for Your Goals
Choosing your tool is the first real creative decision you'll make. The world of AI art is getting crowded, but three names keep coming up for a reason: Midjourney, DALL·E 3, and Stable Diffusion. Each one has its own personality and strengths, so the "best" choice really boils down to what you're trying to accomplish.
Instead of just rattling off features, let's think about this from a creator's point of view. What’s your end goal? Are you trying to create jaw-dropping artistic masterpieces with a unique, opinionated style? Do you just need a quick, reliable way to visualize ideas for a blog post? Or are you a tinkerer who craves absolute control over every pixel?
When you’re looking at different text-to-image generation platforms, think less about which is "better" and more about which one fits your specific project.
To make this easier, I've put together a quick comparison of the big three.
AI Image Generator Comparison
This table gives you a side-by-side look at how Midjourney, DALL·E 3, and Stable Diffusion stack up for the average creator.
| Feature | Midjourney | DALL·E 3 | Stable Diffusion |
|---|---|---|---|
| Best For | Artistic, stylized images | Ease of use, prompt accuracy | Ultimate control & customization |
| Learning Curve | Moderate (Discord-based) | Very Low (Conversational) | High (Requires setup) |
| Artistic Style | Highly opinionated, beautiful | Literal, good for illustration | Highly versatile, user-defined |
| Customization | Limited (parameters, styles) | Minimal (refinements) | Nearly infinite (custom models) |
| Accessibility | Discord | ChatGPT Plus, Copilot | Local install, web UIs |
| Cost | Subscription-based | Included in subscriptions | Free (local), credits (web) |
This should give you a starting point. Now, let's dig into the details of what makes each one tick.
Midjourney for Unmatched Artistic Flair
If you want something that looks like art, you want Midjourney. It's famous for producing images that aren't just technically correct but are genuinely stunning right out of the gate. Its models are trained with a strong artistic bias, which means your results often have a polished, almost curated feel to them.
Midjourney is your go-to if your main goal is creating beautiful, portfolio-worthy digital art, fantasy scenes, or hyper-stylized characters. It’s fantastic at interpreting creative prompts and often spits out something even better than what you had in your head. The only real catch is its workflow—it runs exclusively through Discord, which can feel a little weird at first.
Midjourney's strength is its opinionated aesthetic. It doesn't just generate an image; it interprets your prompt through its own artistic lens. This is amazing for inspiration but can be a hurdle if you need a very precise, literal translation of your idea.
DALL·E 3 for Intuitive and Integrated Creation
DALL·E 3, especially when used inside ChatGPT, is all about simplicity and understanding what you mean. Its biggest advantage is how well it gets natural, conversational language. You can describe a complex scene just like you're talking to a person, and DALL·E 3 will usually nail the key details.
This makes it perfect for marketers, bloggers, or anyone who needs to quickly visualize an idea without getting bogged down in complex prompt syntax. For example, telling ChatGPT to "create an image of a friendly robot helping a child plant a tree in a sunny, futuristic park" just works. Being able to generate and then refine the image in the same conversation is a massive time-saver.
Stable Diffusion for Ultimate Control and Customization
For the creators who want to pop the hood and get their hands dirty, there’s Stable Diffusion. It's the open-source powerhouse of the group. Unlike the others, you can run it on your own computer, train custom models on your own artwork, and plug into a huge ecosystem of community-built tools. This is the platform for technical artists and developers.
You'd want to pick Stable Diffusion if you need to:
- Train custom models: Maybe you want to create images of a specific character, a product, or in a very niche art style.
- Use advanced tools: This is where things like ControlNet come in, giving you precise control over composition and character poses.
- Work completely offline: Run it locally for total privacy without worrying about subscription fees.
All this freedom comes with a steeper learning curve. While there are easy-to-use web versions, unlocking Stable Diffusion's true power means a bit of technical setup. It's the ultimate tool for tinkerers and pros who need granular control to generate AI images from text.
Crafting Prompts That Produce Amazing Results
The quality of the AI images you generate comes down to one thing, really: the quality of your prompt. A prompt is so much more than just a command; it's a detailed creative brief you're handing to the AI. The key to unlocking truly spectacular results is to start thinking like an artist—or maybe even a film director.
Forget asking for just "a dog." You'll get something, sure, but it won't be your something. Instead, build your scene piece by piece. I call this the "building-block" method, where you layer details systematically to get precise control over the final image. You start with a core subject and then just keep adding modifiers for style, lighting, composition, and mood.
This whole approach is what turns a vague idea into a vivid, actionable instruction set for the AI. It's the difference between asking for a quick sketch and commissioning a masterpiece.
The Anatomy of a Powerful Prompt
A great prompt is made up of several key ingredients. While you won't need every single element every time, understanding these components gives you a powerful toolkit for crafting your vision. Think of them as sliders you can adjust to get the perfect outcome.
The foundational elements usually include:
- Core Subject: This is the "what" of your image. Be specific. Don't just say "a car"; try "a vintage 1967 Mustang." The details matter.
- Artistic Style: How should the image look and feel? This could be a medium like "impasto oil painting" or a whole aesthetic like "vaporwave."
- Camera and Lighting: This is where you get to direct the scene like a photographer. Specify camera details like "85mm portrait lens, f/1.8" or lighting cues like "dramatic rim lighting, golden hour."
- Mood and Atmosphere: What emotion are you trying to evoke? Words like "serene," "chaotic," "nostalgic," or "eerie" can completely change the feeling of an image.
By combining these, you can generate images with a level of intention that simple descriptions just can't touch.
The prompt is your paintbrush, your camera, and your director's chair all rolled into one. Every word you add is a deliberate creative choice that guides the AI closer to the image in your mind.
From Simple to Stunning: A Before and After Example
Let's see this building-block method in action. We'll start with a basic concept and progressively add layers of detail to see how the output transforms.
Initial Prompt:
A knight in a forest
This is vague. It'll probably produce a generic, uninspired image because the AI has to make way too many assumptions about the style, the knight's look, and the forest's vibe.
Now, let's apply our building blocks to add some real artistic direction.
Enhanced Prompt:
Epic fantasy portrait of a stoic female knight in ornate silver armor, standing in a misty, ancient redwood forest, cinematic lighting breaking through the canopy, detailed face, 8K resolution, style of Greg Rutkowski and Artgerm
See the difference? This version is radically better. It specifies:
- Subject: "stoic female knight in ornate silver armor"
- Setting: "misty, ancient redwood forest"
- Lighting: "cinematic lighting breaking through the canopy"
- Style: "style of Greg Rutkowski and Artgerm"
- Quality: "detailed face, 8K resolution"
The second prompt leaves far less to chance and is much more likely to produce a breathtaking, portfolio-quality image. For more advanced techniques, our ultimate Midjourney prompt guide offers even deeper insights into structuring complex prompts.
The Power of Negative Prompts
Sometimes, telling the AI what not to include is just as important as telling it what to include. This is where negative prompts come in. Most advanced generators allow you to specify terms you want the AI to avoid when creating the image.
This is incredibly useful for cleaning up common AI mistakes. If your characters keep having distorted hands or you're getting blurry backgrounds, you can add negative prompts to help fix it.
For example, you might add:
--no poorly drawn hands, extra fingers, blurry background, ugly, deformed
Using negative prompts gives you an extra layer of control, helping you filter out undesirable elements and refine your output toward perfection. The sheer volume of creations shows how creators are adopting these methods; between 2022 and 2023, over 15 billion images were created with text-to-image algorithms. You can explore more AI image statistics to see just how rapidly this field is growing.
Fine-Tuning Your AI Art: A Pro Workflow for Better Results
Getting a decent first-pass image from a text prompt is just the first step. The real art, and where the magic happens, is in the refinement process. A solid workflow means you don't just take what the AI gives you; you guide it, tweak it, and polish your creation using a mix of built-in tools and external editors until it’s perfect.
Think of your first generation as a rough sketch, not the final piece. Nearly every AI art platform has tools to help you iterate. Instead of starting from scratch with a new prompt, look for options like vary (subtle) or vary (strong). This is a game-changer when you're almost there but need to explore slight variations of your best result.
This process starts with a strong prompt, which is the bedrock of any good refinement workflow. You need a clear subject, a distinct style, and specific details to get started.
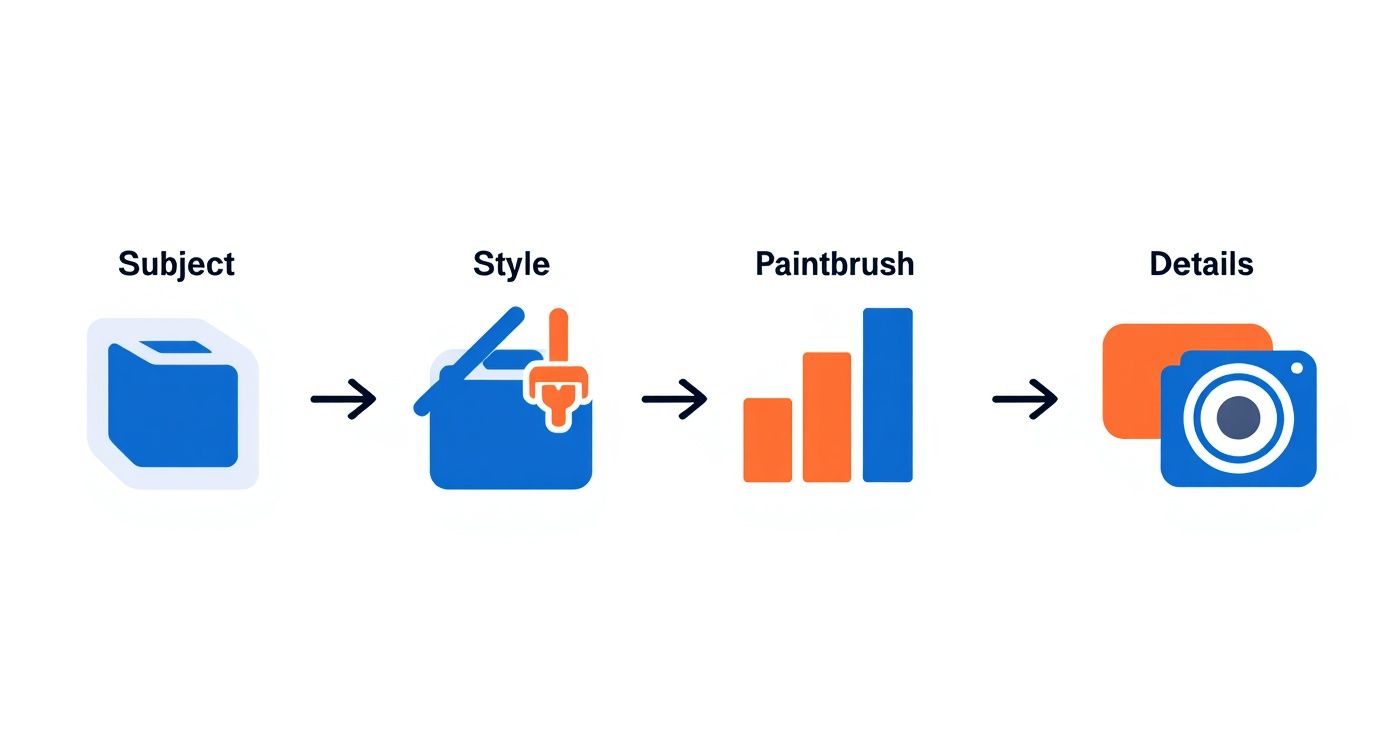
The diagram above breaks it down: a clear subject, enhanced by a specific style, and perfected with camera or lighting details, creates a direct path to a much better outcome.
Iterating and Fixing Inside the Generator
Modern AI tools pack some powerful editing features that can save you a ton of time in post-production. The two you absolutely need to master are inpainting and outpainting.
- Inpainting to Fix Specific Areas: This is your digital scalpel. Did the AI give your character six fingers or a wonky eye? With inpainting, you just select the messed-up area, feed the AI a corrective prompt (like "a perfectly formed human hand"), and it will regenerate just that little piece, blending it right in.
- Outpainting to Expand the Scene: Ever generate an image that feels too tightly cropped? Outpainting (sometimes called "pan" or "zoom out") lets you expand the canvas. The AI intelligently guesses what should be in the new space based on the original image, which is perfect for creating wider landscapes or changing your aspect ratio without distortion.
I like to think of these tools as having a conversation with the AI. You're not just barking an order and accepting whatever it spits out. You're giving feedback, making corrections, and guiding the image toward your final vision.
Post-Processing with External Software
Once you've squeezed every last drop of potential from the AI generator, it's time to bring your image into a dedicated photo editor. This is where you apply that final layer of professional polish with pixel-level control. For this stage, you'll want tools like Adobe Photoshop or a powerful free alternative like GIMP.
In these programs, I focus on a few key enhancements:
- Color Correction and Grading: This is where you make the image feel right. Tweak the brightness, contrast, and saturation to make the colors pop, or apply more advanced color grading to give the whole piece a specific mood, like a cinematic teal-and-orange look.
- Compositing Multiple Images: You can combine the best parts of several different AI generations. Maybe you love the character from one render but the background from another. Compositing lets you merge them into a single, cohesive image that’s better than any of the individual parts.
- Manual Flaw Correction: For those tiny imperfections that inpainting just couldn't nail, classic editing tools like the clone stamp or healing brush are your best friends. They're perfect for cleaning up small artifacts and achieving that flawless finish.
Finally, the last step in my workflow is almost always a dedicated AI upscaler. These tools use AI to increase your image's resolution without making it blurry or pixelated, preparing it for high-resolution screens or even printing. This ensures all your hard work results in a final piece that's crisp, detailed, and ready for any professional use case you can throw at it.
Understanding the Ethics and Copyright of AI Images
Jumping into AI image generation is thrilling, but it also means wading into some murky new waters when it comes to ownership and responsibility. The legal and ethical side of things is still catching up to the technology, which makes it incredibly important to know the lay of the land before you go too far.
You don't need a law degree to navigate this, but you do need to be aware. The first place to start is the terms of service for whatever platform you're using. Every tool, whether it's Midjourney, DALL·E, or Stable Diffusion, has its own rules about commercial use. Some plans give you the green light to sell anything you create, while others might have some strings attached.
Copyright in the Age of AI
So, who actually owns an AI-generated image? That’s the big, complicated question right now.
Historically, copyright law was built to protect things made by humans. This means that while you can often use and even sell the images you generate, getting an official copyright for a purely AI-made piece is a real challenge.
Your best bet is transparency. When you post or sell your work, just be upfront about the tools you used. It builds trust with your audience and clients. This is especially true if you plan to sell your AI art online, where being clear about your process is always a good move.
The Ethics of Prompting
Beyond the legal stuff, there are some ethical lines to consider. A hot-button issue is using the names of living artists in your prompts. Sure, it's a shortcut to a specific style, but it raises some valid concerns about copying an artist’s hard-earned work without their permission or compensation.
A good rule of thumb? Ditch the artist names and learn to describe the style itself. Instead of "in the style of Artist X," try something like, "using bold, graphic lines and a limited, high-contrast color palette." This approach not only respects other artists but also forces you to be a more creative and intentional prompter.
There's no denying how fast this space is growing. The global AI image generator market is expected to hit USD 917.448 million by 2030, according to market trends on Fortune Business Insights. As these tools become a standard part of our creative workflows, creating things ethically and responsibly is only going to become more crucial.
Got Questions About Making AI Images?
As you start coaxing images out of text prompts, you'll inevitably run into a few head-scratchers. It’s totally normal. Getting the hang of the tools, figuring out why your creation has seven fingers on one hand, and understanding the legal stuff can feel like a lot at first.
Think of this as your quick-start FAQ. We'll jump right into the most common hurdles, from finding the best free tools to troubleshooting those frustratingly distorted hands and clarifying whether you can actually sell what you create.
What Are the Best Free AI Image Generators Out There?
If you're not quite ready to pull out your wallet for a subscription, you're in luck. There are several fantastic free options that let you learn the ropes of prompting without any financial pressure.
- Microsoft Copilot (Designer): Honestly, this is probably the most powerful free tool you can get your hands on right now. It runs on a version of DALL·E 3, delivering surprisingly high-quality and coherent images from a simple, chat-based interface.
- Canva's Magic Media: Already using Canva? Perfect. They've built a text-to-image tool right into their platform. You get a limited number of free credits, which is great for quickly whipping up assets for social media posts or presentations.
- Stable Diffusion Demos: Keep an eye on platforms like DreamStudio or Hugging Face. They often host free-to-use demos of Stable Diffusion. You might have to wait in a queue or deal with usage limits, but it gives you a taste of a very powerful and flexible model.
These tools are more than enough to get your feet wet. You can start to really understand the dance between your words and the AI's interpretation.
The best free tool is simply the one that clicks with your own workflow. My advice? Start with Microsoft Copilot for its sheer ease of use and quality, then branch out as you get more comfortable.
How Do I Fix Weird Hands and Mangled Text in My Images?
Ah, the dreaded "AI hands" and garbled text. These are the classic giveaways of an AI-generated image. Models have always struggled with these details because they don't understand anatomy or language like we do—they're just incredibly sophisticated pattern-matching machines.
When you're dealing with distorted hands, try these moves:
- Just Roll the Dice Again: Seriously. Rerunning the exact same prompt can often fix the problem. A different random "seed" might just happen to produce a better result by pure chance.
- Use Inpainting: Most advanced tools have an "inpainting" feature. You can literally draw a mask over the messed-up hand and tell the AI to regenerate only that area with a super-specific prompt like, "a perfectly formed human hand, five fingers, detailed."
- Prompt Your Way Around It: Sometimes, the easiest fix is to just avoid the problem. Tweak your prompt to include things like "hands in pockets" or "holding a coffee mug." It’s a clever way to bypass the issue altogether.
For text, the solution is much simpler: don't ask the AI to generate it. Most models are still terrible at rendering legible words. It’s faster, easier, and looks a thousand times more professional to generate your image without text, then add your words later using a proper editor like Canva, GIMP, or Photoshop. This gives you total control over the font, placement, and style for a polished final image.
Ready to stop guessing and start creating with prompts that are proven to work? PromptDen is a community-driven marketplace where you can discover, share, and even sell high-quality prompts for Midjourney, Stable Diffusion, and more. Explore the PromptDen marketplace and find your next masterpiece.