How to Use Midjourney A Guide to AI Art Mastery

Ready to dive into AI art with Midjourney? The whole experience lives inside Discord, a community chat app. If you're used to web-based tools, this might feel a little different, but it's actually a brilliant setup that creates a super active and collaborative space.
Everything works through a bot you talk to with simple text commands. No worries if you've never used Discord—it’s a piece of cake to get started.
Your First Steps into AI Art with Midjourney
So, how do you get the ball rolling? First things first, you'll need a Discord account. Once that's sorted, your next move is to join the official Midjourney server. Think of it as the central hub for a massive community of AI artists.
The Midjourney server is always buzzing with activity. You'll find channels for announcements, user support, and, most importantly, places to see what everyone else is creating. As a newcomer, you’ll want to head straight for one of the designated "newbie" or "general" channels. This is where the magic begins.
Here’s a peek at what you’ll see. The list on the left is where you'll find those newcomer rooms.
Jumping into these channels is the best way to get a feel for the platform and see the incredible art being generated in real-time.
Creating Your First Image with a Command
Once you're inside one of the newcomer channels, it’s time to use the most important command in Midjourney: /imagine.
Just type /imagine into the message box at the bottom. A little prompt field will pop up, waiting for your creative genius. This is where you describe the image you want the AI to dream up. For your first go, try something simple but clear.
A few ideas to get you started:
a photorealistic cat wearing a tiny wizard hata serene, minimalist landscape painting in the style of Japanese arta neon-lit cyberpunk city street at night, raining
Hit enter, and the Midjourney Bot gets to work. In about a minute, you’ll see four low-resolution versions of your idea pop up in a grid. This is your jumping-off point—from here, you can refine, upscale, or create new variations of any of them.
Key Takeaway: Everything in Midjourney starts with the /imagine command followed by a descriptive prompt. Master that, and you're on your way.
This reliance on Discord is what makes Midjourney special. The server is home to over 21 million registered users, making it the largest community on the entire platform. In fact, about 50% of those users say they only use Discord for Midjourney, which really shows how tied together the tool and the community are.
Midjourney is a powerhouse, but it's not the only game in town. It's always a good idea to explore other leading AI image generation tools to see which one clicks with your creative process. And if you’re curious about the tech that makes all this possible, check out our guide to modern text-to-image models for a deeper look under the hood.
Midjourney Quick Start Checklist
To make getting started even easier, here’s a quick checklist of the essential actions and commands. Keep this handy, and you'll be creating in no time.
| Action | Description | Key Command/Step |
|---|---|---|
| Join Discord | Create a Discord account and join the Midjourney server to get access. | Sign up at Discord.com, then accept the Midjourney invite. |
| Find a Channel | Navigate to a newcomer channel like #newbies to start generating. | Look for channels named newbies-# or general-#. |
| Start Creating | Use the /imagine command to tell the bot what you want to create. | Type /imagine prompt: followed by your text description. |
| Review Your Grid | The bot will generate a 2x2 grid of four initial image options. | Wait for the bot to process your prompt (usually under a minute). |
| Refine and Upscale | Use the U (Upscale) and V (Vary) buttons below the grid to refine your image. | U1-U4 makes an image larger; V1-V4 creates variations. |
This little table covers the core workflow. Once you're comfortable with these steps, you can start exploring all the advanced parameters and techniques Midjourney has to offer. Happy creating
The Art of Crafting Powerful Prompts
Once you move past the basic /imagine command, you start to see where the real magic happens. This is where you shift from being a spectator to an art director. Think of a prompt as a detailed recipe—the quality of your final image is a direct result of the ingredients you put in.
Tossing a vague prompt like a dog at Midjourney will get you exactly that: a generic, uninspired picture of a dog. It does the job, but it's boring.
To really get the most out of Midjourney, you need to wear a few different hats at once: photographer, set designer, and painter. You're not just naming a thing; you're building an entire scene from the ground up. This means getting specific about the subject, what it's doing, the environment it's in, the lighting, and the overall artistic style.
For instance, a simple prompt might be: a knight
A better, more descriptive prompt is: a knight in shining armor
But an excellent prompt gives Midjourney a whole world to work with: cinematic photo of a knight in ornate silver armor, standing in a misty forest, morning sunlight filtering through the trees, fantasy art
That level of detail leaves far less to chance, giving the AI specific directions and dramatically boosting the quality and coherence of the image it creates.
Deconstructing an Effective Prompt
The best prompts are all about layering different elements. While there isn't one single formula that works every time, a fantastic starting point is to think in terms of Subject, Style, and Composition. Let’s break down what each of those means in practice.
- Subject: This is the "what" of your image. Don't be shy with the details. Instead of
car, trya vintage 1967 cherry red Ford Mustang. The more precise you are, the closer Midjourney will get to what's in your head. - Style: This defines the entire vibe. Are you picturing a
photograph, awatercolor painting, or something more out-there likesynthwave art? You can even name specific artists (in the style of Van Gogh), art movements (impressionism), or rendering engines (Octane render) to steer the AI's creative direction. - Composition: This is all about how you frame the scene. Think like a cinematographer. Describing the camera angle, lighting, and mood makes a huge difference. Phrases like
wide-angle shot,dramatic lighting,shallow depth of field, orgolden hourare borrowed straight from photography, and they work wonders here.
By combining these elements, you're handing the AI a rich, detailed instruction set. You're guiding its imagination instead of just asking it to fill in the blanks on its own, which almost always leads to a more satisfying result.
Let's say you're creating a character. A prompt could look like this: close-up portrait of a wise old wizard with a long white beard, detailed wrinkles, kind eyes, studio lighting, fantasy concept art, hyper-detailed. Each comma-separated phrase adds another crucial layer of information.
Real-World Prompt Examples
Seeing the difference between a basic prompt and a powerful one really makes the concept click. Let's look at a couple of before-and-after scenarios to see just how much impact specific language can have.
Scenario 1: Creating a Landscape
- Basic Prompt:
a forest - Powerful Prompt:
An enchanting, misty redwood forest at dawn, sunbeams piercing through the dense canopy, moss-covered ancient trees, ultra-realistic, wide-angle landscape photography
The second prompt doesn't just ask for a forest; it tells a story. It specifies the type of trees, the time of day, the atmospheric conditions, the lighting, and the exact photographic style.
Scenario 2: Designing a Creature
- Basic Prompt:
a dragon - Powerful Prompt:
A majestic crystal dragon perched on a volcanic rock, iridescent scales shimmering with arcane energy, smoke billowing from its nostrils, digital painting, epic fantasy art
Here, we've added crucial details about the dragon's texture (crystal, iridescent scales), its surroundings (volcanic rock), what it's doing (smoke billowing), and the artistic medium (digital painting).
Learning from what works is a huge part of getting better. For more inspiration, you can find some truly masterful Midjourney prompt examples for 2025 that show how the experts blend these elements together.
Tips for Better Prompting
Crafting great prompts is a skill that you'll hone over time. As you experiment, keep these tips in your back pocket.
- Use Commas for Separation: Commas are your best friend. Use them to separate distinct ideas within your prompt. This helps Midjourney process each element as a separate concept to combine into the final image.
- Be Specific with Adjectives: Vague words like
beautifulorniceare subjective and don't give the AI much to work with. Instead, use descriptive adjectives that paint a clear picture, likeserene,vibrant,gothic, orminimalist. - Think About Mood and Atmosphere: Use words that evoke a specific feeling. Terms like
eerie,joyful,melancholy, andchaoticcan completely transform the tone of your image. - Experiment with Weighting: We'll dive into advanced parameters later in this guide, but just know that you can actually tell Midjourney to prioritize certain words over others. This gives you an incredible amount of fine-tuned control over the final output.
Unlocking Control with Advanced Parameters
If a well-crafted text prompt is the heart of a Midjourney creation, then parameters are the brain. These are the technical commands you tack onto the end of your prompt, giving you precise, director-level control over the final image. Honestly, learning how to use Midjourney's parameters is what separates the casual dabblers from artists who are serious about getting what they want out of the AI.
These simple commands let you call the shots on everything from image dimensions to artistic flair, turning the AI from a creative partner into a powerful, obedient tool. By mastering just a few key parameters, you can make every generation more intentional and much closer to your original vision.
Think of it as an iterative process. If a prompt isn't quite hitting the mark, you can either add more detail to the text or start refining the output with parameters.

The key is to keep tweaking—either by adding specificity or fine-tuning the existing components—until you get the result you're after.
Shaping Your Canvas with Aspect Ratio
One of the most fundamental and impactful parameters you'll use is Aspect Ratio, which you control with the --ar command. By default, Midjourney kicks out square images (a 1:1 ratio), but your idea might demand a cinematic widescreen shot or a vertical portrait that's perfect for a phone screen.
Using the --ar parameter couldn't be simpler. You just add it to the end of your prompt followed by the ratio you want.
--ar 16:9is your go-to for a cinematic, horizontal image that feels like a still from a movie.--ar 2:3gives you that classic vertical portrait orientation.--ar 4:5is a common ratio for social media posts on platforms like Instagram.
For example, /imagine a lone astronaut gazing at a distant nebula, cinematic --ar 16:9 will produce a dramatically different composition than the default square. This is one of the easiest ways to immediately make your artwork feel more professional and intentional.
Dialing in the Artistic Intensity
How much creative freedom should the AI have? You get to decide with the Stylize parameter, written as --s. This command influences how strongly Midjourney's own aesthetic training gets applied to your image.
The values for this parameter range from 0 to 1000, with the default setting being 100. A lower value, like --s 50, tells the bot to stick very closely to your prompt, resulting in a more literal interpretation. Pushing it to a higher value, like --s 750, encourages the AI to get more artistic and interpretive. This can lead to stunning, highly detailed results, but they might stray a bit from your original prompt.
Pro Tip: If you feel like Midjourney is ignoring parts of your prompt, try lowering the --s value. On the flip side, if your images feel a bit bland, cranking up the stylization can introduce that missing artistic spark.
Embracing Creative Chaos
Sometimes, the best ideas come from a little bit of randomness. That's where the Chaos parameter, or --c, comes in. It injects more variety and unexpected elements into your initial four-image grid. The values for this one range from 0 to 100.
A higher chaos value (say, --c 50) will generate four initial images that are wildly different in composition and style. This is an incredible tool for brainstorming when you're not entirely sure what you want. You might prompt for a fantasy castle, and a high chaos value could give you one made of ice, another in the clouds, one underwater, and a fourth built into a giant tree. It's fantastic for breaking creative blocks.
Using a low chaos value (or just leaving it out) results in four images that are more subtle variations of the same core concept.
To help you keep track of the most useful commands, here’s a quick-reference guide to some of the essential Midjourney parameters.
Essential Midjourney Parameter Guide
| Parameter | Command | What It Does |
|---|---|---|
| Aspect Ratio | --ar | Sets the width-to-height ratio of the image (e.g., --ar 16:9). |
| Chaos | --c <0-100> | Controls how varied and unexpected the initial grid of images will be. |
| Stylize | --s <0-1000> | Influences how strongly Midjourney's artistic style is applied. |
| Negative Prompt | --no | Excludes specific objects or concepts from the image. |
This table covers the heavy hitters you'll likely use in most of your prompts. Mastering just these four will give you a massive amount of control.
Advanced Prompting Techniques
Beyond the basic parameters, you can use some special syntax right inside your prompt to get even more granular control.
- Negative Prompts: Use the
--noparameter to tell Midjourney what you don't want to see. If you're generating images of a serene forest but keep getting modern buildings in the background, just add--no buildingsto explicitly exclude them. This is incredibly useful for cleaning up unwanted artifacts or elements. - Multi-Prompting and Weights: You can separate concepts with a double colon (
::) to have Midjourney consider them individually. For instance, the prompthot:: dogwill make the AI think about "hot" and "dog" separately, which is very different from the single concept of "hotdog." You can even add weights to emphasize one part over another, likehot::2 dog. In this case, "hot" is considered twice as important as "dog," likely resulting in an image that is fiery, steaming, or intensely red.
This is the level of control that allows for true mastery over the AI's output. By combining descriptive text with these powerful parameters, you can guide the generation process with incredible precision.
Refining Your Art: An Iterative Workflow
A truly great image rarely just happens on the first try. Think of the first four-image grid Midjourney gives you not as the destination, but as the starting point. This is where the real work—and the real fun—begins. Mastering this tool means learning how to refine, taking a promising concept and patiently iterating on it until it becomes a polished masterpiece. You're shifting from just typing a prompt to actively directing the AI toward your vision.
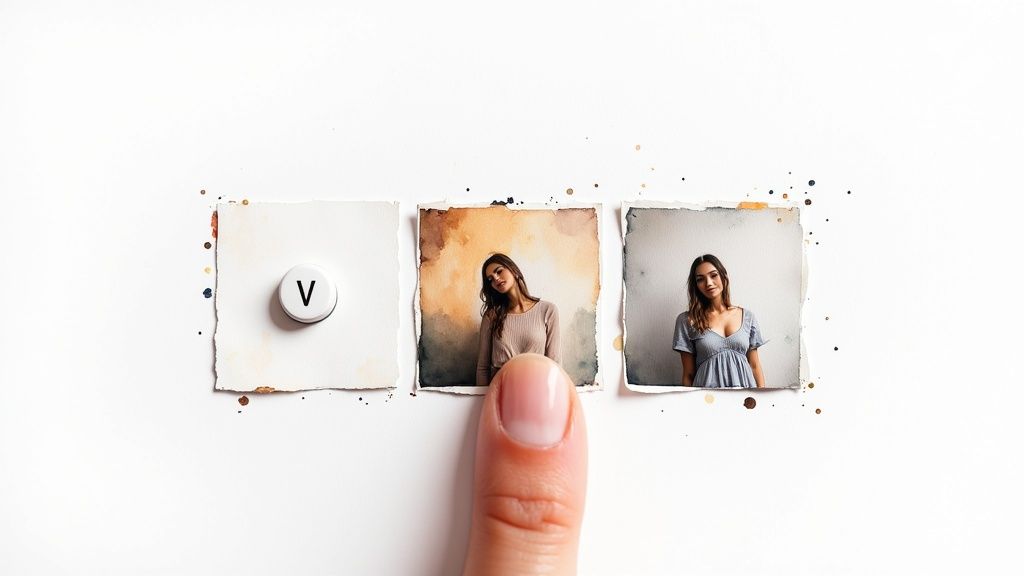
The whole workflow is about building on your strongest ideas. Once your initial grid appears, you’ll see two rows of buttons underneath it: U1, U2, U3, U4 and V1, V2, V3, V4. These are your primary tools for shaping the outcome. The numbers correspond to the images in the grid, starting with 1 in the top-left and moving clockwise to 4 in the bottom-right.
Here's the breakdown:
- The U buttons stand for Upscale. Clicking one tells Midjourney you like that specific image and want a larger, more detailed version.
- The V buttons create Variations. This is your go-to when an image is almost there but needs a tweak. Clicking a V button generates a new grid of four images that are similar in style and composition to your selection.
Choosing Between Variations and Upscaling
Deciding which button to press is the core of this whole process. It really just depends on how you feel about what the AI gave you.
- When to Upscale (U): If one of the four images is a home run—the composition is strong, the details are right, and the mood is perfect—then it's time to upscale. This essentially finalizes the image, locking it in and adding a ton of detail and resolution.
- When to Create Variations (V): If an image has a great concept but the execution is a little off—maybe a character has a weird expression or the lighting feels flat—variations are the answer. It’s your chance to reroll the dice while keeping the core elements you already liked.
Once you upscale an image, a new set of options appears, letting you get even more granular with your adjustments.
Key Insight: Don’t just settle for the first grid. The best Midjourney artists I know run dozens of variations, patiently exploring different creative paths until they land on something truly exceptional. This iterative approach is what separates good results from great ones.
Subtle Versus Strong Variations
After you've upscaled an image, you’ll notice two new variation options: Vary (Subtle) and Vary (Strong). This gives you a finer degree of control over how much the AI changes things in the next generation.
- Vary (Subtle): This makes very small, minor changes. It's perfect for fixing tiny imperfections like a weird texture on a wall or a slightly off-kilter detail without messing up the whole composition.
- Vary (Strong): This introduces more significant changes. It might alter a character's pose, switch up the background, or add new details, all while trying to maintain the original vibe. Use this when the concept is solid, but you want to see a completely fresh take on it.
Making the right choice here is crucial for refining your work efficiently without losing what you liked in the first place.
Expanding Your Canvas
Midjourney also has amazing tools to literally expand your creative canvas. Once you have an upscaled image, you’ll see panning arrows (⬅️➡️⬆️⬇️) and Zoom Out options. These are absolute game-changers for creating more dynamic scenes.
The panning arrows extend the image in whatever direction you choose, using the content of your existing image to intelligently fill in the new space. It's an incredible way to turn a tight portrait into a full-body shot or a simple landscape into a sprawling panorama. The Zoom Out feature keeps your original image at the center but generates new details around it, effectively widening the "lens" of your virtual camera. You can zoom out by 1.5x, 2x, or even set a custom zoom level.
Gaining Ultimate Control with Remix Mode
For the highest level of control, you need to enable Remix Mode. It's a must-have setting. Just type the /settings command and click the Remix mode button to turn it on.
With Remix active, clicking a V button does something new. Instead of instantly generating variations, it opens a pop-up box that lets you edit your original prompt first. This is unbelievably powerful. You can change the lighting from daylight to golden hour, add a smiling expression to a character, or switch the entire style from photorealistic to watercolor.
Remix mode combines the power of variations with on-the-fly prompt editing, giving you surgical control over each iteration. This is how you truly steer the AI to a specific, intended outcome.
Making Midjourney Part of Your Creative Workflow
This is where the magic happens—when you move beyond just typing commands and start weaving Midjourney into how you actually create. Think of it less like a tool and more like a creative partner. A few simple adjustments to your process can make a world of difference.
First thing's first: if you're getting serious, set up your own private Discord server. The public "newbie" channels are great for seeing what's possible, but they're an absolute firehose of other people's work. Your own creations get swept away in seconds, making it a nightmare to track your ideas and build on them.
Invite the Midjourney Bot to your private server, and you've instantly got a quiet, personal studio. You can create different channels for specific projects—like #Client-Logos, #Character-Concepts, or #Website-Assets. It's a simple organizational hack that keeps everything tidy and is probably the single most effective way to use Midjourney for real, sustained work.
Finding the Right Subscription Plan
To unlock the platform's full potential, you'll need a paid plan. Which one you choose really boils down to how you plan to use it. Midjourney's plans are built to scale with you, whether you're a casual hobbyist or a full-time professional.
- Basic Plan: This is the perfect starting point. You get a set number of "Fast" GPU minutes each month, which is more than enough for dabbling and handling smaller personal projects. It’s a low-risk way to get your feet wet.
- Standard & Pro Plans: These tiers are where things get serious. You get a lot more Fast GPU hours and, more importantly, you unlock Relax Mode. In Relax Mode, your generations go into a queue and take a bit longer, but they don't burn through your Fast hours. This is a total game-changer for anyone needing to generate images in high volume without constantly watching the clock.
It's interesting to see how people are using it. While 68% of users initially jump in just for fun, a solid 32% are using it as a professional tool for things like concept art, marketing visuals, and rapid prototyping. The numbers don't lie—about 80% of new users upgrade to a paid plan within their first week. You can read more about AI's growing role in visual creativity over at Embryo.com.
Ethical Use and Community Standards
As AI-generated art becomes more common, it's vital to be mindful of the ethics involved. While paid Midjourney subscribers typically own the rights to the images they create, the conversation around AI's place in the art world is complex and ongoing.
A Key Consideration: Be transparent about your tools. Simply crediting Midjourney (e.g., "Image created with Midjourney") is a great best practice, especially in professional work. It builds trust and acknowledges the technology’s role in your creation.
This is especially true if you’re a designer putting together a portfolio. To properly display your work, you might want to check out some of the best portfolio sites for designers that are well-suited for showcasing unique, AI-assisted art.
And if you're thinking about turning this hobby into a side hustle, you need to understand the market. Take a look at our guide on how to sell AI art for a practical look at online success. It dives into platforms, pricing, and the legal stuff to help you navigate this exciting new space responsibly. Following these practices ensures you're not just another user, but a thoughtful and respected creator in the AI art community.
Got Questions About Midjourney? We've Got Answers.
As you start getting the hang of Midjourney, you’ll naturally run into some practical questions. It happens to everyone. Think of this as your go-to guide for those common sticking points—we’re talking free access, keeping your art organized, version differences, and the big one: copyright.
Let's clear up the confusion so you can get back to creating. These are the questions that pop up constantly, and knowing the answers upfront will make your workflow so much smoother.
Is Midjourney Still Free to Use?
This is probably the most asked question, and the answer has evolved. For a while, Midjourney offered a free trial that gave newcomers a taste of the magic with a handful of free image generations. But due to insane popularity and some misuse, that free trial is often on pause.
Realistically, to use Midjourney today, you’ll want to jump on a paid plan. The Basic Plan is a great, affordable starting point that gives you a solid chunk of "fast generation" minutes each month. It’s always smart to check the official Midjourney Discord for announcements on trial availability, but a subscription is your guaranteed ticket in.
How Do I Keep My Midjourney Images Organized?
Trying to work in the public newbie channels is pure chaos. Your amazing creations get swallowed up in a flood of everyone else's work in seconds. The single best thing you can do for your sanity and workflow is to add the Midjourney Bot to your own private Discord server.
Doing this gives you a clean, personal workspace where you're the only one generating images. Want to take it to the next level? Create separate channels within your server for different projects, just like you’d have different folders on your computer.
- #project-logos
- #character-concepts
- #architectural-viz
This approach keeps everything neat and tidy. And don't forget, every image you create is automatically saved to your gallery on the Midjourney website. Just log in with your Discord account to see your entire history, where you can search, download, and sort everything into collections.
Setting up a private server isn’t just about organization; it’s about creating your own dedicated studio. You transform Midjourney from a crowded public space into a focused, professional tool built for your creative process.
What's the Difference Between Midjourney Versions?
Midjourney is always getting better. The team behind it is constantly pushing out new AI models, and each version brings massive leaps in quality, realism, and how well it understands your prompts. You can easily jump between models by adding the --v parameter to your prompt, like --v 6.0 or --v 5.2.
The latest version is almost always the most powerful and is what you'll want for complex scenes or photorealism. That said, some older versions have a certain vibe or aesthetic that artists love for specific styles. To make life easier, you can use the /settings command to pick a default version so you don't have to type it out every single time.
Are My Midjourney Images Copyrighted?
This is a huge question, especially if you're using Midjourney for commercial work. The short answer is yes—according to Midjourney's terms of service, paid subscribers own the assets they create. This gives you broad rights to use your images for pretty much anything, including client projects.
Now for the nuance. The legal world is still catching up to AI art. While Midjourney grants you ownership, getting a formal copyright from an entity like the U.S. Copyright Office can be a different story. They often require "significant human authorship," a standard that can be tricky to prove with AI-generated images. For anyone on the rare free trial, the images fall under a more restrictive Creative Commons license.
At PromptDen, we're building a community where creators can discover, share, and perfect the prompts that fuel incredible tools like Midjourney. Explore our platform to find inspiration for your next project or share your own masterful prompts with the world. Visit us at https://promptden.com to get started.