Your Stable Diffusion Prompt Guide
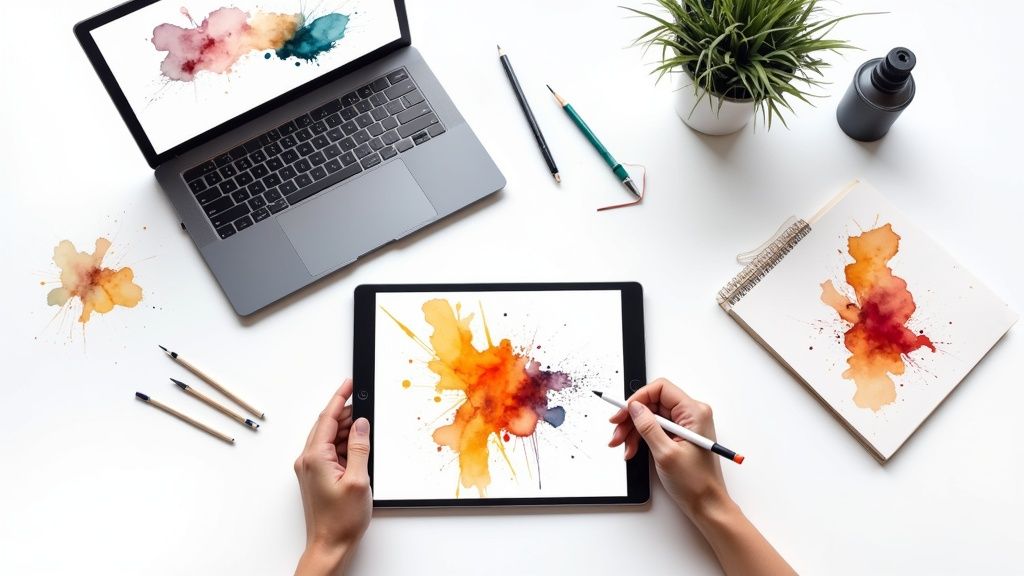
This Stable Diffusion prompt guide is your ticket to finally moving past random, unpredictable outputs and start creating the specific, incredible images you actually have in your mind. The real magic isn't just the AI—it's your ability to tell it exactly what you want.
When you get good at this, you can turn simple ideas into breathtaking art. You're basically learning to speak the AI's language.
Why Mastering Prompts Is Your AI Art Superpower
Think of a Stable Diffusion prompt like a conversation. A vague request like "a castle" will probably get you a generic-looking fortress, but it's rarely going to be something memorable. The real power gets unlocked when you learn to feed the AI rich, descriptive instructions that guide it toward your unique vision.
Honestly, this skill is the single biggest factor in getting high-quality, intentional results. The difference is night and day.
Just compare a generic "castle" prompt to something with more substance:
A majestic, gothic castle perched on a cliffside at sunset, intricate stonework, cinematic lighting, fantasy, highly detailed, trending on Artstation.
See the difference? This detailed prompt doesn't just ask for a building; it paints a picture with words, setting the mood, style, and quality. Mastering this process is what turns you from someone just clicking a button into an active creator who directs the AI with precision.
The Power of Open-Source Creativity
Stable Diffusion is a powerful open-source model that first dropped back in August 2022. A huge part of its appeal is that it can run pretty well on consumer-grade GPUs, which made high-end image generation accessible to pretty much everyone. Its open-source nature means you're tapping into a massive community that's constantly sharing new tools and techniques.
This screenshot from Stability AI's homepage gives you a little glimpse into the broad ecosystem you're joining.

It's this vibrant, community-driven environment where new prompting methods are born and shared, giving you an endless stream of resources to get better.
More Than Just Images
Here's the thing: the skill of prompt engineering goes way beyond static visuals. The same principles apply to dynamic creations, as we're already seeing with cutting-edge AI video models like Sora, which literally transforms text into vivid motion.
As these technologies keep evolving, the ability to translate an idea into a precise text command is only going to become more valuable. By getting good at prompts for Stable Diffusion now, you're building a foundational skill for the entire future of AI-driven content. You’re not just making pretty pictures; you’re learning how to communicate with the next generation of creative tools.
The Anatomy Of A High-Impact Prompt
Forget just tossing random keywords at Stable Diffusion and hoping for the best. There's a repeatable framework that experienced prompters use to get incredible, consistent results. This isn't just about making a list; it's a strategic way of thinking about your image from the ground up, starting with the big picture and dialing in the details.

The secret is all about understanding how Stable Diffusion thinks. It pays way more attention to the words at the beginning of your prompt, which is why the order of your components is so critical. Your main subject absolutely has to lead the charge.
Key Takeaway: Always put the most critical parts of your vision at the front of the prompt. Stable Diffusion weighs the initial terms more heavily, so build your prompts with a clear hierarchy of importance.
To make this easier to remember, here's a quick cheatsheet of the core components and the order they should generally appear in.
Core Prompt Component Cheatsheet
| Component | Purpose | Example Phrases |
|---|---|---|
| Subject | The main focus of the image. Be as specific as possible. | "a stoic warrior king", "an ancient, moss-covered treehouse", "a sleek cyberpunk motorcycle" |
| Medium | The artistic material or format of the image. | "DSLR photograph", "oil painting", "3D render", "watercolor illustration", "pixel art" |
| Style | The artistic influence or aesthetic vibe you're aiming for. | "by Greg Rutkowski", "art nouveau", "impressionist", "steampunk aesthetic", "vaporwave" |
| Composition | The camera angle, shot type, and framing. | "close-up portrait", "wide angle shot", "aerial view", "full body shot", "Dutch angle" |
| Lighting | The mood and atmosphere created by the light sources. | "cinematic lighting", "golden hour", "soft, diffuse light", "neon glow", "dramatic rim lighting" |
Let's dive a bit deeper into what each of these means in practice.
Start With Your Subject
The subject is the absolute heart of your image—the non-negotiable "who" or "what" that everything else orbits around. Get specific right from the jump.
Don't just say "a warrior." Instead, try something like "an ancient knight in ornate silver armor." This simple change gives the AI a much stronger, more defined concept to work with. Think of it like the foundation of a house; if the subject is weak, the final image will feel generic and shaky.
Define The Medium
Next up, tell the AI how you want the image rendered. This is the medium, and it has a massive impact on the texture, feel, and overall aesthetic. Are you going for hyperrealism or something more abstract?
Here are a few common mediums I lean on:
- Photograph: This is your go-to for realism. You can get even more granular with terms like "DSLR photograph" or "Polaroid."
- Oil painting: Gives you that classic, textured look with visible, rich brushstrokes.
- Watercolor painting: Produces a softer, more fluid style where colors bleed into one another.
- 3D render: For a clean, polished look that you’d see in digital art or high-end animation.
- Illustration: This is a broad category, so you can narrow it down with "vector illustration" or "comic book art."
Choosing your medium is a powerful lever. It’s one of the first decisions to make right after you've nailed down your subject.
Inject A Specific Style
Now for the fun part: the style. This is where you inject personality and borrow from specific artistic influences. This usually means referencing artists, art movements, or popular aesthetics.
For example, adding "by Greg Rutkowski" is a classic move in the Stable Diffusion world for getting that epic, dramatic fantasy art look, simply because the model was heavily trained on his work. You can also use terms like "cyberpunk," "steampunk," "art nouveau," or "impressionist" to completely change the vibe.
This is also where knowing your tools helps. Different text-to-image models interpret artistic styles in their own unique ways. For a deeper dive, check out our guide to modern text-to-image models to see how various platforms handle these stylistic inputs.
Control The Composition
Composition is all about guiding the viewer's eye and setting the scene. It’s your "camera" angle and the framing of your subject. Don't let the AI guess on this one—take control.
Simple composition terms can make a world of difference:
- Close-up: Focuses tightly on the subject's face or a key detail.
- Medium shot: Shows the subject from roughly the waist up, great for portraits.
- Full body shot: Captures your subject from head to toe.
- Wide angle shot: Places your subject within a larger environment to establish context.
- Aerial view: Looks down on the scene from high above.
Being deliberate here is crucial for avoiding those generic, centered-in-the-frame results. A simple 'a dog' prompt is a lottery, but specifying the breed, the environment, and the camera shot turns it into a targeted creation. This refinement process is key; in fact, over 55% of AI users find themselves constantly tweaking their prompts to get better results.
Perfect The Lighting
Finally, lighting is what sets the mood. It can take a flat, boring image and make it dramatic, emotional, and totally immersive. This element often comes toward the end of the prompt, but it's just as important as the rest.
Think about the atmosphere you're trying to create:
- Golden hour: Warm, soft, and beautiful light. Perfect for flattering portraits.
- Cinematic lighting: High contrast and dramatic shadows, great for epic scenes.
- Neon lighting: Throws you into a futuristic or nightlife setting with vibrant, glowing colors.
- Soft, diffuse lighting: Even and gentle, which is ideal for clean, simple aesthetics.
By layering these five components—Subject, Medium, Style, Composition, and Lighting—in that order, you’re not just writing a prompt. You’re building a blueprint for the AI to follow, giving you a reliable framework to turn any idea into a stunning visual.
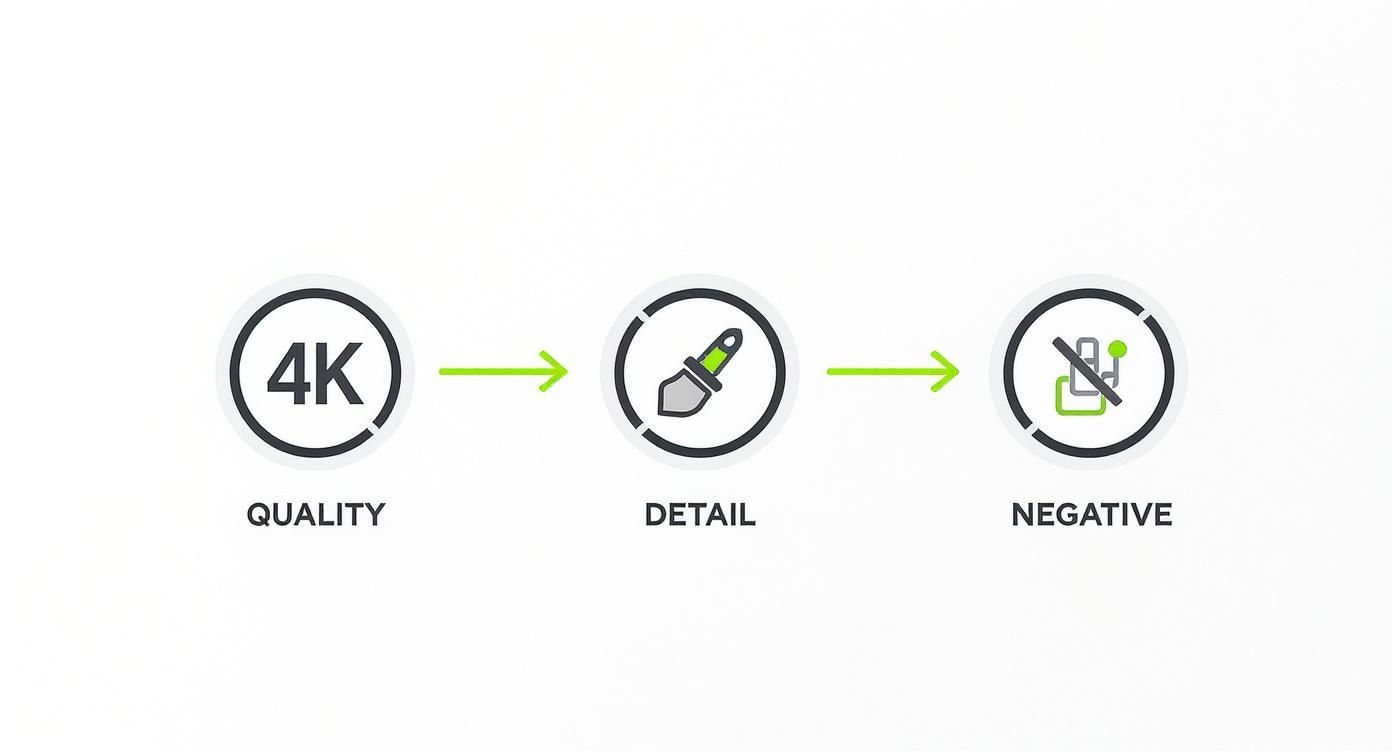
Using Modifiers To Fine-Tune Your Art
Imagine turning a simple phrase into an image that looks like it belongs in a gallery. Modifiers let you do exactly that—they give you control over style, depth, and realism in your Stable Diffusion prompts.
With quality boosters like 4k, highly detailed, and trending on artstation, you can instantly crank up resolution and texture. This helps ensure your scenes pop, your characters are crisp, and every detail sings.
Negative prompts work like a laser, cutting away unwanted artifacts—blurred edges, strange anatomy, you name it. Simply flag tags such as "blurry" or "bad anatomy" to guide the model away from these common pitfalls.
Quality Modifiers For Crisp Detail
To sharpen every corner of your render, try these go-to modifiers:
- 4k for ultra-high resolution.
- Highly detailed to spotlight textures and fine elements.
- Octane render for rich, cinematic lighting.
- Photorealistic to push color and shadow toward lifelike.
When you need to nudge an element up or down, weighting is your friend:
(castle:1.5)to make that fortress dominate the frame.[background:0.8]to gently fade out busy scenery.
Here’s how different weights shift focus:
| Modifier | Effect | Use Case |
|---|---|---|
(subject:1.2) | Boosts prominence | Emphasize main character in a scene |
[background:0.7] | Reduces focus | Soften busy or clashing backgrounds |
(detail:1.3) | Sharpens textures | Highlight ornate costumes or armor |
--v 5.1 | Activates advanced model features | Unlock higher fidelity when available |
Negative Modifiers To Eliminate Artifacts
Think of negative prompts as your cleanup crew. They spell out exactly what you don’t want to see.
Common terms include:
- "blurry"
- "lowres"
- "bad anatomy"
- "extra limbs"
Key Insight Negative modifiers can improve success rate by over 30% in first drafts.
Adding them is straightforward:
--neg "blurry, bad hands, bad anatomy, lowres"
This screenshot shows the modifier input fields in the AUTOMATIC1111 Stable Diffusion WebUI where you can add positive and negative prompts. It highlights how straightforward it is to toggle modifiers on or off during generation.
Emphasizing Key Elements Over Distractions
Let’s say you want a hero’s red cloak to stand out. A weight like (red cloak:1.4) will boost vibrancy and draw the eye. Then use [green:0.6] to hush the forest around them.
Try this prompt:a warrior with a flowing red cloak(1.4) standing on a hill,[green:0.6], cinematic lightingYou’ll get a crisp silhouette set against muted foliage—a much stronger focal point. This approach keeps attention exactly where you want it.
Tips For Mastering Modifier Balance
Finding the right mix is part science, part intuition. Tweak weights in small steps—0.1 at a time—and review your output.
Run 5 to 10 quick tests for each change. Record which modifiers worked best.
Follow this quick checklist:
- Begin with broad terms, then narrow focus.
- Adjust weights gradually to avoid sudden shifts.
- Combine positive and negative modifiers for cleaner results.
- Use version control on your prompts for easy rollbacks.
"Precise weighting turned my average render into a portfolio piece overnight," recalls one seasoned artist.It’s a small shift that makes a big difference.
Common Pitfalls To Avoid
Too many modifiers can overwhelm the model, leading to unpredictable results. Don’t pair conflicting weights like (castle:1.5) and (castle:0.8)—they cancel each other out.
Keep experiments lean:
- Change one weight per test.
- Log everything in a table.
- Iterate based on what you see.
By layering quality boosters, negative prompts, and careful weighting, you’ll shape the final image exactly how you envisioned it. This method hands you full creative control.
Tools To Visualize Modifier Impact
Visual feedback accelerates learning. Try these community tools:
- PromptDen’s PromptForge: Side-by-side previews of different weights.
- AUTOMATIC1111 WebUI Stats Panel: Charts token influence per run.
- Lexica.art Gallery: Filter images by prompt elements for fresh ideas.
- Git Version Control: Compare prompt edits and revert when needed.
| Tool | Feature | Benefit |
|---|---|---|
| PromptDen PromptForge | Side-by-side prompt comparison | Spot subtle differences immediately |
| WebUI Stats Panel | Visual charts of modifier frequency | Identify overused or ignored terms |
| Lexica Gallery | Prompt element filters | Discover new modifier combinations |
| Git Version Control | Diff view for prompt edits | Revert and compare historical prompts |
Visualizing your prompt changes will accelerate learning and art quality.You'll notice where your strengths lie.
These modifier techniques are your toolkit for precision. Use them to refine every aspect of your image.
Bringing It All Together
Start by adding a few quality boosters—you’ll see an immediate leap in clarity. Then layer in negative prompts to scrub out common errors.
Tweak weights with parentheses and brackets, run test renders, and compare side by side. Continue refining until the image perfectly matches your vision.
- Note each modifier’s effect in a spreadsheet.
- Use visuals to compare output variations.
- Share your best prompts on community hubs for feedback.
- Keep evolving your approach as you learn new tricks.
Mastering modifiers is a skill that amplifies every aspect of your AI art.It becomes second nature after some practice.
Visit PromptDen for prompt modifiers.Explore more at PromptDen to keep improving your prompts.
My Prompting Workflow From Idea To Masterpiece
I’ve found that seeing a prompt evolve in real time makes all the difference. Rather than talking in abstractions, I’ll share the exact sequence I follow to turn a rough concept into a polished, high-impact Stable Diffusion prompt. Along the way, you’ll see how small tweaks can drastically shift mood, detail, and overall quality.
Iteration 1: The Simple Idea
Every project starts with a spark. In this case, I keep it basic:Prompt: a futuristic city
The AI delivers towering skyscrapers and a hint of sci-fi flair. It’s a decent starting point but feels generic—lacking atmosphere, emotion, or any signature style.
Iteration 2: Adding Style And Lighting
Next, I mood up the scene. I want that Blade Runner–style grit and dramatic glow. So I drop in some art direction:
Prompt: oil painting of a futuristic city, **neon noir**, **cinematic lighting**
Suddenly, we have vibrant reflections, moody shadows, and a painterly texture that distances the image from a bland 3D render.
Iteration 3: Injecting Quality And Detail
The vibe is there, but crispness and fine details are still too soft. Time for quality modifiers. These keywords push the model to refine edges and amplify textures:
Prompt: epic oil painting of a futuristic city, neon noir, cinematic lighting, **highly detailed**, **sharp focus**, **trending on ArtStation**
Now the architecture pops, neon signs glow with precision, and every window feels alive.
Key Takeaway: Layering style, lighting, and quality terms transforms a flat image into a dynamic scene.
Iteration 4: Using A Negative Prompt
Even at this stage, little flaws sneak in—blurry spots, oddly shaped vehicles drifting at the edges. Time for a cleanup pass with a negative prompt:
Positive Prompt: epic oil painting of a futuristic city, neon noir, cinematic lighting, highly detailed, sharp focus, trending on ArtStationNegative Prompt: blurry, deformed, ugly, bad anatomy, out of frame
By telling the model what to avoid, you sharpen the final result and keep unwanted artifacts at bay.
This four-step loop—start simple, dial in style, boost detail, and clean up—turns prompt crafting into a deliberate process rather than guesswork. It’s the same backbone I use when experimenting with image-to-image transformations. For a deeper dive into how prompts drive those techniques, check out our practical guide to Stable Diffusion image-to-image.
Bulletproof Your Prompting
- Keep your initial idea razor-focused
- Pick a clear art style and lighting reference
- Add quality modifiers for sharpness and detail
- Use negative prompts to filter out glitches
Mastering this cycle will dramatically improve your workflow—and the art you generate.
Troubleshooting Common Prompting Headaches
Even the best-laid prompts can go sideways. You might get an image that’s technically correct but completely soulless, find the AI totally ignored a key detail you know you typed, or end up with the dreaded mangled hands and extra limbs. It happens to everyone, and fixing it is often easier than you'd think.
When an image comes out wrong, resist the urge to just hit "generate" again and hope for the best. Instead, put on your detective hat. Figuring out why it failed lets you make specific, targeted fixes. This not only solves the problem at hand but makes you a much sharper prompter over time.
Why Your Images Look Generic Or Bland
This is probably the most common frustration. You get an image that matches your prompt literally but has zero artistic flair. The lighting is flat, the composition is boring, and the whole thing just feels... meh.
This usually happens when your prompt is too straightforward and doesn't give the AI enough creative direction. Without it, the model just defaults to the most average, clipart-like version of your subject.
The fix? Inject some artistry with modifiers.
- Specify a Medium: Don't just ask for "a warrior." Try "an oil painting of a warrior" or "a cinematic photograph of a warrior."
- Add Lighting Cues: Words like "cinematic lighting," "golden hour," or "dramatic rim lighting" can single-handedly transform the mood and depth of a scene.
- Use Quality Boosters: Terms like "highly detailed," "sharp focus," and "trending on artstation" act like a signal to the AI that you expect a high-quality, polished result.
Pro Tip: If your image feels sterile, the fastest fix is to layer in stylistic and lighting terms. Think of them as creative guardrails that steer the AI away from a bland, literal interpretation and toward a specific aesthetic.
When The AI Ignores A Key Detail
It’s maddening when you ask for a "knight with a red shield" and Stable Diffusion proudly presents a knight holding a blue one. This happens because the AI sometimes has trouble linking a specific attribute to a specific subject, especially in a busy or complex prompt.
The solution here is to give that detail more weight. You have two main tools for this: prompt order and weighting.
- Move It Forward: Stable Diffusion pays more attention to words at the beginning of the prompt. Try rephrasing to bring the important detail closer to the front. So, instead of "
a knight in silver armor holding a red shield," switch to "a knight with a **red shield** in silver armor." - Increase Its Weight: Use parentheses to tell the AI that a particular term is extra important. For example, "
a knight with a (**red shield:1.3**)" instructs the AI to pay roughly 30% more attention to the "red shield" concept. Start with small bumps like1.1or1.2and see how it responds before going higher.
Combining these two techniques is a powerful way to force the AI to prioritize the elements that are critical to your vision.
Fixing Mangled Hands And Weird Anatomy
Ah, the infamous AI hands. Getting anatomically correct hands, faces, and limbs has always been a major challenge for diffusion models. When you end up with distorted features, six-fingered hands, or other anatomical nightmares, your best defense is a good offense—and that means using negative prompts.
A negative prompt is simply a list of all the things you don't want to see in your image. It acts as a filter, guiding the model away from common pitfalls and artifacts. For a full breakdown of this crucial skill, check out our dedicated guide on mastering Stable Diffusion negative prompts.
Here’s a quick-fix table to get you started on troubleshooting the most common anatomical blunders.
Prompt Troubleshooting Quick Fixes
When your image generations go off the rails, it's often due to a few common issues. This table helps you quickly identify the problem and apply a direct fix, usually by strengthening your negative prompt.
| Common Problem | Likely Cause | Solution |
|---|---|---|
| Mangled Hands | The model struggles with the complex geometry and countless poses of hands. | Add to negative prompt: bad hands, extra fingers, mutated hands, poorly drawn hands |
| Warped Faces | Conflicting styles or lack of detail can distort facial features. | Add to negative prompt: ugly, tiling, poorly drawn face, out of frame, extra limbs, disfigured |
| Blurry or Messy | The prompt may be too abstract or lack quality-boosting keywords. | Add to negative prompt: blurry, bad anatomy, blurred, watermark, grainy, signature |
Starting with a solid negative prompt cleans up a huge number of potential errors right from the start. Keep a go-to list of negative keywords and add to it as you notice recurring problems in your own generations. It’s a simple step that makes a massive difference in the quality of your final images.
Your Questions About Prompts Answered
As you get your hands dirty with Stable Diffusion, you’re bound to have some questions. It happens to everyone. This section is all about tackling the most common ones I hear, giving you clear, straightforward answers to get you unstuck and back to creating.
Think of this as your go-to FAQ for fine-tuning your process.
How Long Should My Prompt Be?
This is a classic. The honest answer? It’s not about word count; it's about quality. While there's a technical limit (usually around 75 tokens, or roughly 75 words, before the AI starts to get confused), obsessing over that number will just slow you down.
From my own experience, the sweet spot for a really effective prompt is somewhere between 20 and 60 words. That gives you enough room to lay out the rich details but keeps it tight enough that the AI doesn't lose focus on your main subject. Sure, super short prompts can work for simple ideas, but you'll often get generic-looking images. Go too long, and you risk diluting the most important parts of your prompt as the AI tries to juggle everything at once.
Key Takeaway: Focus on clarity, not length. A crisp 30-word prompt that nails the subject, style, and lighting will always beat a rambling 100-word prompt full of conflicting ideas. And always, always put your most important concepts right at the beginning.
What Exactly Is A Negative Prompt?
A negative prompt is basically your "do not include" list. It’s an incredibly powerful tool for cleaning up your images, telling Stable Diffusion what elements, styles, and common glitches to avoid. When you explicitly tell the AI what you don't want, you're steering it toward a much cleaner, more professional-looking result.
If you skip the negative prompt, you’re basically rolling the dice and inviting common AI artifacts like:
- Blurry, low-res textures
- Mangled hands, extra fingers, or just plain weird anatomy
- Distorted or "uncanny valley" faces
- Random watermarks, signatures, or text
- Bad composition where your subject is cut off
Want an immediate quality boost? Use a universal "starter" negative prompt. Just copy and paste this into the negative prompt field to filter out the most common problems right from the get-go.
My Go-To Starter Negative Prompt:
ugly, tiling, poorly drawn hands, poorly drawn feet, poorly drawn face, out of frame, extra limbs, disfigured, deformed, body out of frame, bad anatomy, watermark, signature, cut off, low contrast, underexposed, overexposed, bad art, beginner, amateur, distorted face
Adding this one thing acts as a quality filter, giving your main prompt a much better shot at success.
Where Can I Find Good Prompt Ideas?
Honestly, the best way to learn is to see what other people are making. Breaking down a successful prompt is like looking under the hood of a car; you start to see how all the pieces fit together to make something great. Luckily, the Stable Diffusion community is super open and loves to share its work.
Instead of staring at a blank text box, go immerse yourself in platforms where creators post their images along with the exact prompts they used. It's a goldmine of inspiration and practical learning.
Here are a few of my favorite spots for prompt hunting:
- Lexica.art: This is a massive, searchable library of AI images and the prompts that created them. It's an indispensable resource for finding new styles and figuring out how they're made.
- Civitai: While it's famous for custom models, the image galleries on Civitai are packed with incredible examples and super detailed prompts shared by the community.
- Reddit Communities: Subreddits like r/StableDiffusion are buzzing with activity. People share their art, ask for help, and post their entire workflows.
By hanging out in these communities, you won't just find new ideas—you'll pick up on the subtle tricks of prompt crafting from artists and engineers who are deep in the trenches every day.
Ready to discover, share, and even monetize your best creations? At PromptDen, we've built a community-driven platform for AI enthusiasts just like you. Browse thousands of high-quality prompts for Stable Diffusion, Midjourney, and more, or share your own work in our marketplace. Explore PromptDen today and take your AI art to the next level.