Your Stable Diffusion Prompts Guide for AI Art Mastery
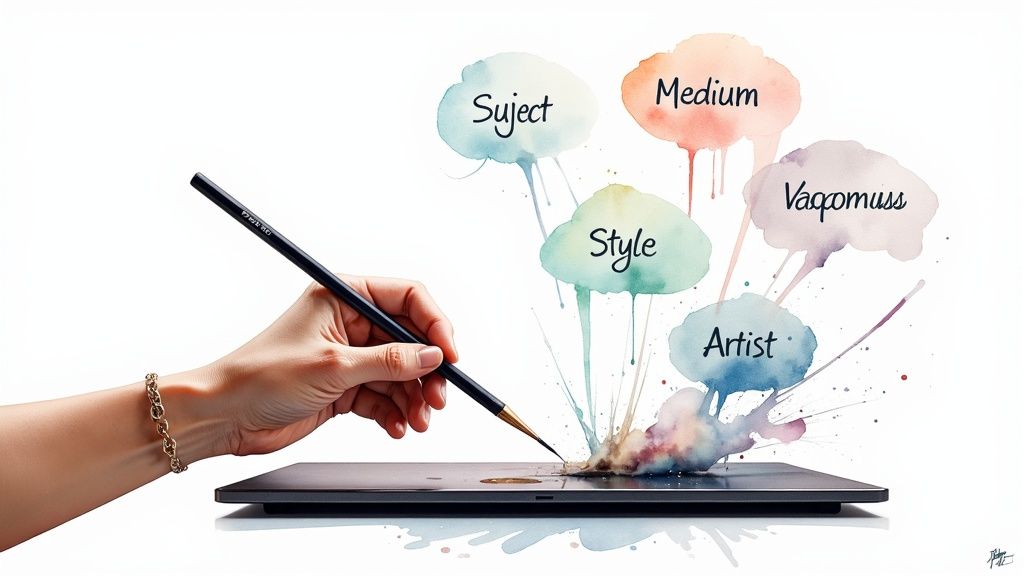
Think of a good Stable Diffusion prompt as a recipe. You're not just throwing ingredients in a bowl; you're carefully combining a subject, a medium, and a style to guide the AI toward the exact image you have in your head. Learning to write effective prompts is like learning the AI's native language—it's the key to turning simple text into stunning, detailed art.
How Stable Diffusion Turns Your Words Into Worlds

Before you can really get good at this, you need to understand what’s happening under the hood. Stable Diffusion isn't some magical artist with its own imagination. It’s more like an infinitely knowledgeable art historian that has seen millions of images but has zero creative spark of its own. It’s completely reliant on your words to piece concepts together.
The whole process starts when you hit "generate." The AI takes your prompt and translates it into a complex mathematical language it can understand. Then, it creates a canvas of pure random noise—like TV static—and starts refining it, step by step, chipping away at the chaos until it matches the concepts from your prompt.
The Power of Training Data
Everything Stable Diffusion "knows" comes from the images it was trained on. This massive visual library is its entire worldview, which is why certain words trigger very specific aesthetics.
For instance, type in "cyberpunk," and you'll almost always get images dripping with neon lights, futuristic cityscapes, and a gritty, moody atmosphere. Why? Because that’s what the model learned to associate with that term from all the cyberpunk images it analyzed.
Grasping this connection is your first real step toward becoming an effective AI art director. You’re not just barking commands; you’re tapping into a vast, interconnected web of visual data. Your prompt is the map you give the AI to navigate this library.
Key Takeaway: Every single word in your prompt is a signpost. The more specific and descriptive your signposts are, the more control you'll have over the final image. Vague terms will almost always lead to generic or unexpected results.
From Text to Digital Masterpiece
The technology behind Stable Diffusion is built on some major leaps in machine learning, where deep neural networks are trained to recognize patterns in enormous datasets. This kind of tech is everywhere now, from social media feeds to marketing tools. It's what allows the model to predict how different concepts should look when they're put together.
This fundamental idea—turning text into a coherent output—isn't just for images. To get a better handle on the bigger picture, reading up on AI-powered content creation can give you some valuable context. It really all boils down to learning how to communicate your intent clearly.
And if you’re ready to go deeper into the tech itself, our guide to modern text-to-image models is a great place to see how different models stack up.
Deconstructing the Perfect AI Art Prompt
Think of a powerful prompt as a detailed recipe, not just a single instruction. If you just ask for "a house," you're leaving way too much up to the AI. You'll likely get something generic and uninspired. To really take the driver's seat, you need to provide a structured set of ingredients that guide the model toward your specific vision.
The most effective prompts I've seen are built from distinct, layered components. Once you start breaking your ideas down into these fundamental pieces, you'll have a repeatable framework for turning any concept into a stunning image. It’s the difference between asking for a "car" and getting a "blue 1967 Mustang, cinematic shot, moody lighting."
This concept map gives you a good look at the basic flow from your text to the final image.
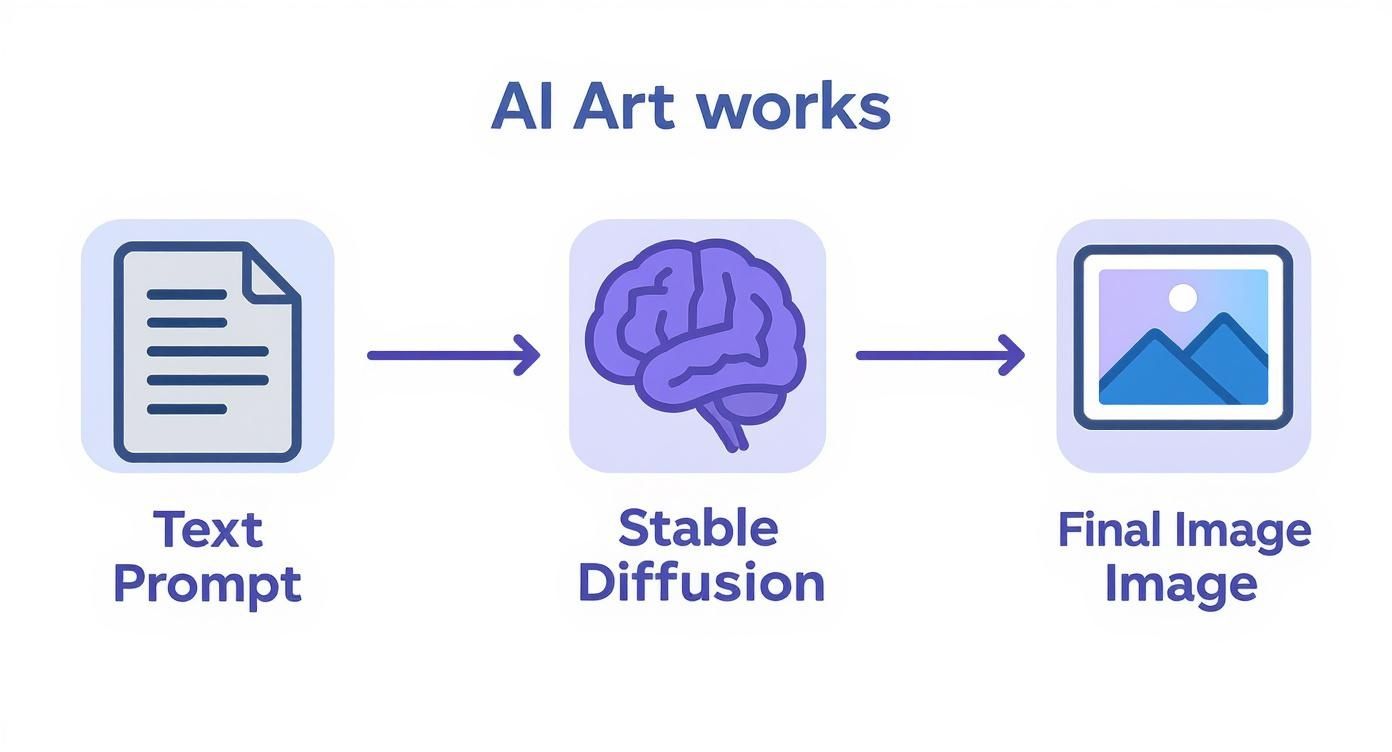
As you can see, the quality of your prompt directly dictates what Stable Diffusion spits out. It's that simple.
To show how these pieces come together, let's build a prompt from the ground up.
How Prompt Components Shape Your Image
This table breaks down how each component adds a new layer to the image, using a simple "cat" subject to show the evolution.
| Prompt Component | Example Keyword/Phrase | Effect on Image | Example Prompt Snippet |
|---|---|---|---|
| Subject | A cat | Establishes the core element of the image. It's the "what." | A fluffy ginger cat |
| Medium | oil painting | Defines the physical art form, adding texture and a classic feel. | oil painting of a fluffy ginger cat |
| Style | surrealist | Injects a specific artistic movement, influencing mood and composition. | surrealist oil painting of a fluffy ginger cat |
| Artist | in the style of Salvador Dali | Narrows the style to a specific artist's signature techniques. | surrealist oil painting of a fluffy ginger cat, in the style of Salvador Dali |
| Finishing Touches | cinematic lighting, 4k | Adds technical details that polish the final output. | surrealist oil painting of a fluffy ginger cat, in the style of Salvador Dali, cinematic lighting, 4k |
By layering these components, you give the AI a much clearer blueprint to work from, resulting in a more refined and intentional final image.
Start With The Subject
The subject is the "what" of your image—the main character, object, or scene. This is your anchor, so be as specific as you can. Don't just say "a woman." Try "an old woman with kind eyes and silver hair, reading a book." That specificity is crucial. The more details you give, the less the AI has to guess.
Don't forget to add some context. Where is this subject? What are they doing? Adding a setting like "in a sunlit library" or an action like "sipping tea" adds a layer of narrative depth for the AI to grab onto.
Define The Medium
Next up is the medium. This component defines the physical form of your art. Are you picturing a photograph, an oil painting, a watercolor sketch, or maybe a 3D render? The medium dramatically changes the texture, feel, and overall vibe.
Here are a few I use all the time:
- Digital Painting: Creates that smooth, modern look you see in a lot of concept art.
- Oil Painting: Gives a classic, textured feel with visible brushstrokes.
- Ink Wash Painting: Produces a minimalist, often monochromatic style with soft gradients.
- 35mm Film Photograph: Adds a vintage, grainy quality to the image that feels authentic.
Choosing the right medium is like picking the right camera lens; it fundamentally frames how your subject is perceived.
Inject A Specific Style
Style is where you can really inject personality. This is all about the artistic movement or aesthetic you're aiming for. Think of terms like "Impressionism," "Surrealism," "Cyberpunk," or "Art Deco." Each style brings its own visual language—color palettes, shapes, and moods—that the AI has learned from its training data.
Pro Tip: Don't be afraid to mix and match styles. A prompt like "a surrealist statue in a cyberpunk city" can produce some incredibly unique and compelling results. The AI is surprisingly good at blending concepts that might seem contradictory at first.
Reference An Artist
If you want a highly specific aesthetic, referencing an artist is one of the most powerful tricks in the book. Naming an artist like "in the style of Vincent van Gogh" or "in the style of Hayao Miyazaki" tells Stable Diffusion to mimic their signature techniques, color choices, and compositional habits. It’s a fantastic shortcut to a very particular look and feel.
This technique is so effective because the AI has studied the works of countless artists. By invoking a name, you're tapping into a massive dataset of visual information tied to that creator's entire body of work. For more advanced techniques like this, our essential prompt engineering guide is a great next step.
Add The Finishing Touches
Finally, it's time for the finishing touches. These are the technical and atmospheric details that can take an image from good to great. This category covers everything from lighting and camera angles to resolution.
Think about tossing in elements like:
- Lighting: "cinematic lighting," "soft ambient light," "dramatic backlighting"
- Composition: "wide angle shot," "close-up portrait," "dutch angle"
- Detail Level: "highly detailed," "intricate," "4k," "8k"
- Color Palette: "vibrant colors," "monochromatic," "pastel colors"
Crafting effective prompts is a genuine skill, and it's essential for getting the most out of these AI tools. The best practice today is to be precise and detailed to guide the image generation, which massively impacts the final quality. This level of control is exactly why artists and designers are adopting Stable Diffusion—they can create high-resolution imagery with fine-grained control over every detail. The principles of prompt engineering go beyond 2D images, too. You can see the broader impact by exploring how text prompts are now used for generating 3D models from a prompt.
Fine-Tuning Your Vision with Prompt Weighting
Alright, you've got the basic building blocks down. But now it's time to really take the director's chair. You've probably noticed that sometimes, even a perfectly written prompt doesn't give you the balance you want. The AI might obsess over one detail while completely ignoring another.
This is where prompt weighting comes into play. It’s your secret weapon for telling the AI exactly what to focus on—turning up the volume on some elements and hitting the mute button on others. Instead of just listing ingredients, you're now specifying the exact recipe. This skill is what turns frustrating misses into jaw-dropping masterpieces.
Amplifying Key Details with Parentheses
The most common way to crank up a keyword's influence is by wrapping it in parentheses (). Every time you add a set of parentheses, you're essentially shouting at Stable Diffusion, "Hey, this part is really, really important!"
Let's say you're crafting a portrait of a warrior, and the make-or-break detail is her glowing red eyes.
- Without Weighting:
portrait of a fantasy warrior with red eyes - With Weighting:
portrait of a fantasy warrior with ((red eyes))
With the first prompt, you might get a faint reddish tint, or the AI might just default to brown eyes if it gets distracted. But by adding those double parentheses, you’re making the red eyes a non-negotiable focal point. The result? Intensely vibrant, glowing eyes that define the whole image.
A Practical Tip: In most Stable Diffusion interfaces, a single set of parentheses (keyword) bumps up the emphasis by a factor of 1.1x. Add another set, like ((keyword)), and you square that effect to about 1.21x. Just be careful not to go overboard—too much weight can lead to weird, distorted artifacts.
For more surgical precision, you can use a colon and a number, like this: (keyword:1.3). This tells the AI to increase the term's strength by exactly 30%. It’s perfect for when you need a subtle nudge, not a giant shove.
De-Emphasizing Distractions with Brackets
Just as you can amplify details, you can also tone them down. This is a game-changer for preventing certain ideas from overpowering your scene or for including a subtle detail without making it the star of the show. Your tool for this is a pair of square brackets [].
Imagine you want a picture of a serene, empty beach, but the AI keeps stubbornly adding people and boats.
- Problematic Prompt:
a beautiful sunny beach - Weighted Solution:
a beautiful sunny beach, [people], [boats]
By putting people and boats in brackets, you're telling Stable Diffusion to actively downplay them. It's a softer touch than a negative prompt; you're not forbidding them, just asking the AI to reduce the odds of them appearing.
This trick is also fantastic for managing background details. If detailed cityscape creates a scene that’s too busy and distracts from your main subject, try tweaking it to a man standing in front of a [detailed] cityscape. You still get the city vibe, but the background noise is turned down, letting your subject pop.
Real-World Scenarios for Weighting
Knowing the syntax is one thing, but knowing when to use it is what really elevates your craft. Here are a few common situations where weighting will be your best friend:
- Fixing a Forgotten Detail: You ask for
a wizard holding a crystal ball, but the ball is barely visible or missing entirely. A quick fix isa wizard holding a ((glowing crystal ball)). Problem solved. - Balancing Competing Styles: You want a
cyberpunk city in the style of Van Gogh, but the neon glow is drowning out the classic brushstrokes. Try this:(cyberpunk city) in the style of (Vincent van Gogh:1.2). This gives the artistic style the priority it needs. - Controlling Character Features: The AI keeps giving your character the wrong hair color. Force its hand with weighting:
woman with ((bright pink hair)).
Mastering prompt weighting gives you the precision of a sculptor, letting you carefully shape the AI's focus. It shifts prompting from a game of chance to a deliberate act of creation, making sure the final image is a true reflection of what you had in mind.
The Art of Negative Prompts to Remove Flaws
Crafting the perfect prompt often feels like an additive process—you layer in subjects, styles, and details until your vision starts to take shape. But what happens when the AI throws in a few… creative ideas of its own? That’s when you learn that what you don’t ask for is just as important as what you do.
This is where the negative prompt comes in. Think of it as your most powerful tool for quality control. It’s a direct instruction telling Stable Diffusion what to avoid, acting like a filter to remove common flaws before they even have a chance to appear. Getting this right will save you countless hours of re-rolling images and give you firm control over the final output.
Why Negative Prompts Are a Game-Changer
Generative AI models can sometimes produce some truly strange artifacts. We've all seen them: mangled hands with six fingers, characters with an extra leg, blurry backgrounds, or just a generally messy, low-quality feel.
Negative prompts are your direct line to the model to say, "Hey, don't do that."
This technique has become a cornerstone for serious prompt engineers. By explicitly telling the model to exclude things like 'blurry', 'disfigured', or 'extra limbs', you can dramatically improve the coherence and quality of your images. It’s one of the key differentiators between amateur and professional-looking AI art.
By proactively steering the AI away from these common pitfalls, you ensure the final image aligns much more closely with what you actually had in mind.
Building Your Universal Negative Prompt
While some negative prompts are hyper-specific to one image, every artist should have a go-to "universal" negative prompt in their toolkit. This is your foundational list of terms that you can apply to almost any generation to instantly boost its quality. Think of it as a boilerplate for clean, professional results.
A great starter list often includes terms that target the most frequent issues:
- Anatomy:
extra fingers, mutated hands, poorly drawn hands, extra limbs, disfigured, bad anatomy - Quality:
blurry, grainy, low-resolution, pixelated, jpeg artifacts, bad quality - Composition:
poorly drawn face, mutation, ugly, out of frame, watermark, signature, text
This list acts as a safety net, catching many of the most frequent AI goofs. You can save this as a template and just paste it into the negative prompt field for nearly every image you create.
Key Insight: Your negative prompt isn't just a simple list. You can use weighting—like ((extra limbs))—in your negative prompt just as you would in your positive one to more forcefully tell the AI to exclude an unwanted element.
Context-Specific Negative Prompts
Beyond a universal list, the most effective negative prompts are tailored to the specific image you're creating. The goal here is to eliminate anything that might clash with your desired mood, subject, or composition.
Here are a few scenarios where specific negative prompts make all the difference:
- For a Moody Forest Scene: You might add
bright sunlight, clear skies, vibrant colorsto make sure the AI keeps a dark, atmospheric feel. - For a Clean Architectural Photo: Using
people, cars, clutterhelps guarantee the focus stays squarely on the building's structure, free of distractions. - For a Character Portrait: If you want a serious expression, including
smiling, laughing, cheerfulin the negative prompt can stop the AI from defaulting to a happy face.
This table breaks down how you can use targeted negative prompts to solve some all-too-common image generation headaches.
Common Issues and Their Negative Prompt Fixes
| Common Issue | Example Negative Prompt | Why It Works |
|---|---|---|
| Deformed or extra fingers | mutated hands, extra fingers, malformed limbs | Directly targets common anatomical errors, forcing the model to generate more realistic hands. |
| Blurry or out-of-focus details | blurry, out of focus, soft focus, depth of field | Instructs the AI to avoid rendering techniques that reduce image sharpness. |
| Unwanted text or signatures | text, watermark, signature, letters | Prevents the model from adding garbled text or artist-like signatures, a common AI artifact. |
| Cluttered or busy background | crowd, clutter, busy background, other people | Simplifies the scene by telling the AI to exclude distracting background elements. |
| Off-brand or clashing colors | neon, oversaturated, vibrant colors, bright | Narrows the color palette to maintain a specific mood, like muted or monochromatic. |
This targeted approach gives you incredibly fine-tuned control over the narrative and composition of your art.
For a deeper dive into this crucial skill, check out our complete guide on mastering Stable Diffusion negative prompts. Learning to properly wield negative prompts is a massive step toward creating consistently impressive images.
Taking Your AI Art to the Next Level with Advanced Workflows
Once you've got the hang of writing individual prompts, the real fun begins. It's time to start stringing those techniques together into powerful, multi-step workflows. This is the moment you graduate from just generating cool, one-off images to thinking like an artist with a vision for a whole project.
These advanced methods are all about giving you more control. They let you iterate, refine, and build a consistent visual language across dozens of images. We're moving way beyond basic text-to-image here. You can start with a photo you already have, lock in a specific character's face, or blend concepts together to create something nobody's ever seen before.
Using Image-to-Image for Precision Control
One of the most powerful tools in your entire AI arsenal is image-to-image, which you'll usually see shortened to img2img. Instead of letting the AI dream up an image from pure digital noise, img2img uses an image you provide as a blueprint. This could be anything—a quick sketch, a photograph, or even an AI image you just made.
You still write a text prompt to tell the AI what you want, but now it will use the colors, shapes, and overall composition of your input image as a heavy-handed guide. This is a game-changer when you have a specific layout in mind that's just too tricky to describe with words.
Here are a few ways I use it all the time:
- I'll sketch a super simple stick figure or a rough character pose, upload it, and use a detailed prompt to have the AI render it in a stunning photorealistic style.
- I can snap a photo of my messy office and use a prompt like "a cozy wizard's study, ancient spellbooks stacked high, magical glowing orb on the desk, style of a fantasy painting" to completely re-skin the room while keeping the desk and chair in the same spots.
- I often feed one of my own AI creations right back into the model with a slightly tweaked prompt to fix a weird-looking hand or change the lighting.
My Two Cents: The "denoising strength" setting is your best friend in img2img. Keep it low (around 0.25) if you only want subtle changes that stick very close to your original image. Crank it up (to 0.75 or higher) to give the AI more creative freedom to completely reinterpret your input based on the prompt.
Locking in Consistency with Seeds
Ever generate an image that's almost perfect, but needs one tiny change? Or maybe you created a character you absolutely love and want to see them in a bunch of different scenes? This is where the seed number becomes your secret weapon.
The seed is just a number that kicks off the AI's random starting point. Here's the magic: if you use the exact same prompt with the exact same seed, you will get the exact same image. Every single time. This repeatability is the key to creating consistent art.
Once you lock in a seed, you can:
- Iterate on a Single Image: Keep the seed the same and make tiny adjustments to your prompt. For example, changing
a warrior looking serioustoa warrior laughingcan alter their expression without changing their face, armor, or the background. It's incredibly precise. - Maintain a Consistent Style: Found a seed that just produces a vibe you love? You can reuse that same seed with totally different subjects to apply a consistent aesthetic across an entire series of images.
- Turn Accidents into Assets: If you ever stumble upon a "happy accident"—a weirdly cool composition or a gorgeous color palette—save that seed number immediately. It's no longer an accident; it's now a repeatable tool in your creative kit.
Developing Your Signature Look
When you start combining these advanced workflows, you're not just making images anymore; you're developing a cohesive artistic style. This is absolutely essential for bigger projects, like creating illustrations for a book, designing assets for a game, or just building a portfolio that looks like you.
First, figure out the core DNA of your style. This is usually a mix of specific artist influences, a certain medium (like "oil painting" or "35mm film"), and a consistent color palette.
For example, you could decide your signature look is something like this:
cinematic film still, moody atmospheric lighting, anamorphic lens flare, in the style of Blade Runner, teal and orange color palette
You can save this whole chunk of text and use it as the stylistic foundation for all your prompts. From there, you can use specific seeds to create consistent characters or environments that all live within that world. By layering img2img on top, you can fine-tune compositions and make sure every single piece feels like it belongs.
This systematic approach is what separates the casual user from the art director. You're no longer just rolling the dice and hoping for a lucky shot. You're deliberately building a world, one carefully guided generation at a time. It’s a powerful shift that truly unlocks what Stable Diffusion is capable of.
Got Questions About Your Stable Diffusion Prompts?
As you get your hands dirty with Stable Diffusion, you're bound to hit a few snags. It's just part of the process. Don't worry, everyone runs into confusing results and weird outputs when they're starting out.
Let's walk through some of the most common questions and frustrations I see people have. Think of this as your quick-start troubleshooting guide to get you back on track.
Why Do My Images Look Nothing Like My Prompt?
This is easily the most common headache, and the answer almost always comes down to being more specific. If your prompt is too vague, you're essentially asking the AI to fill in the blanks, and its imagination might be very different from yours.
Instead of a simple prompt like "a wizard," you need to paint a much clearer picture. Try something like, "detailed portrait of an old wizard with a long white beard, holding a glowing staff, fantasy art." Also, watch out for concepts that clash. A prompt like "photorealistic cartoon" is confusing because you're pulling the AI in two completely different directions.
Pro Tip: A solid negative prompt is your best friend. Adding universal cleanup terms like blurry, deformed, bad anatomy, ugly can work wonders on your results before you even hit "generate."
How Can I Get Consistent Characters or Styles?
Creating a consistent look is where you move from making cool one-off images to building a real project. The secret weapon for this is the seed number.
The seed is just the random starting point the AI uses to begin generating your image. If you use the exact same prompt and the same seed, you'll get the exact same image. Every single time. By locking in that seed, you can make tiny changes to your prompt—like changing a character's expression from smiling to frowning—while the character's face and the scene's composition stay the same.
For a consistent style, it's all about creating a "style phrase" that you can reuse.
- Example Style Phrase:
cinematic lighting, fantasy art, by Greg Rutkowski, highly detailed, 4k - Just save this little snippet and tack it onto the end of prompts for different subjects to keep that signature look across all your images.
What's the Deal with Parentheses and Brackets?
These are your volume controls. Officially, it's called prompt weighting, but really, it's just a way to tell the AI what's important and what's not.
Parentheses () crank up a word's importance. Think of it like shouting. For example, a warrior with ((glowing red eyes)) tells the model that those glowing eyes are a non-negotiable, dominant feature. Each extra set of parentheses adds more emphasis.
On the flip side, square brackets [] turn down the volume on a word. This is super useful for adding subtle details that you don't want to take over the whole image. Using a city with [flying] cars will give you fewer, or less obvious, flying cars than if you had just written the words normally.
Are There Words I Just Shouldn't Use?
Absolutely. You'll want to stay away from subjective words like "beautiful," "amazing," or "stunning." The AI has no emotional concept of what "beautiful" means; it only understands concrete, visual descriptions.
Instead of asking for a "beautiful woman," describe why she's beautiful: symmetrical face, soft cinematic lighting, kind eyes, vibrant colors. You have to stick to language that paints a clear picture. It's also a good idea to be careful with really niche pop culture references—if it wasn't in the training data, the model will just get confused and give you something bizarre.
At PromptDen, we're building a community where you can find, share, and even sell the prompts that power your creativity. Discover high-quality prompts for Stable Diffusion and other AI models at https://promptden.com.